As an Amazon Associate I earn from qualifying purchases.
Baking sourdough bread is a deeply satisfying and rewarding experience. It all begins with the art of kneading. For those who are looking to create their own loaves of sourdough from scratch, learning how to knead sourdough bread properly is crucial. The right kneading technique can make a significant difference in the texture, structure, and flavor of your bread. In this guide, we’ll explore the step-by-step process of kneading sourdough, the science behind it, and some tips and tricks to perfect your technique.
What is Sourdough Bread?
Sourdough bread is one of the oldest forms of leavened bread, distinguished by its natural fermentation process. Unlike commercial breads that rely on store-bought yeast, sourdough uses wild yeast and beneficial bacteria that occur naturally in flour and the environment.
This process not only causes the dough to rise but also imparts a signature tangy flavor that many bread enthusiasts adore. To understand how to knead sourdough bread effectively, it’s important to first grasp the basics of this ancient baking method.
Key Ingredients
The essential ingredients for making sourdough bread are quite simple:
- Flour: Most recipes use a mix of white flour and whole wheat flour, though the types of flour can vary.
- Water: Water helps to activate the flour and form the dough. It also supports the fermentation process.
- Salt: This ingredient adds flavor and controls the fermentation speed.
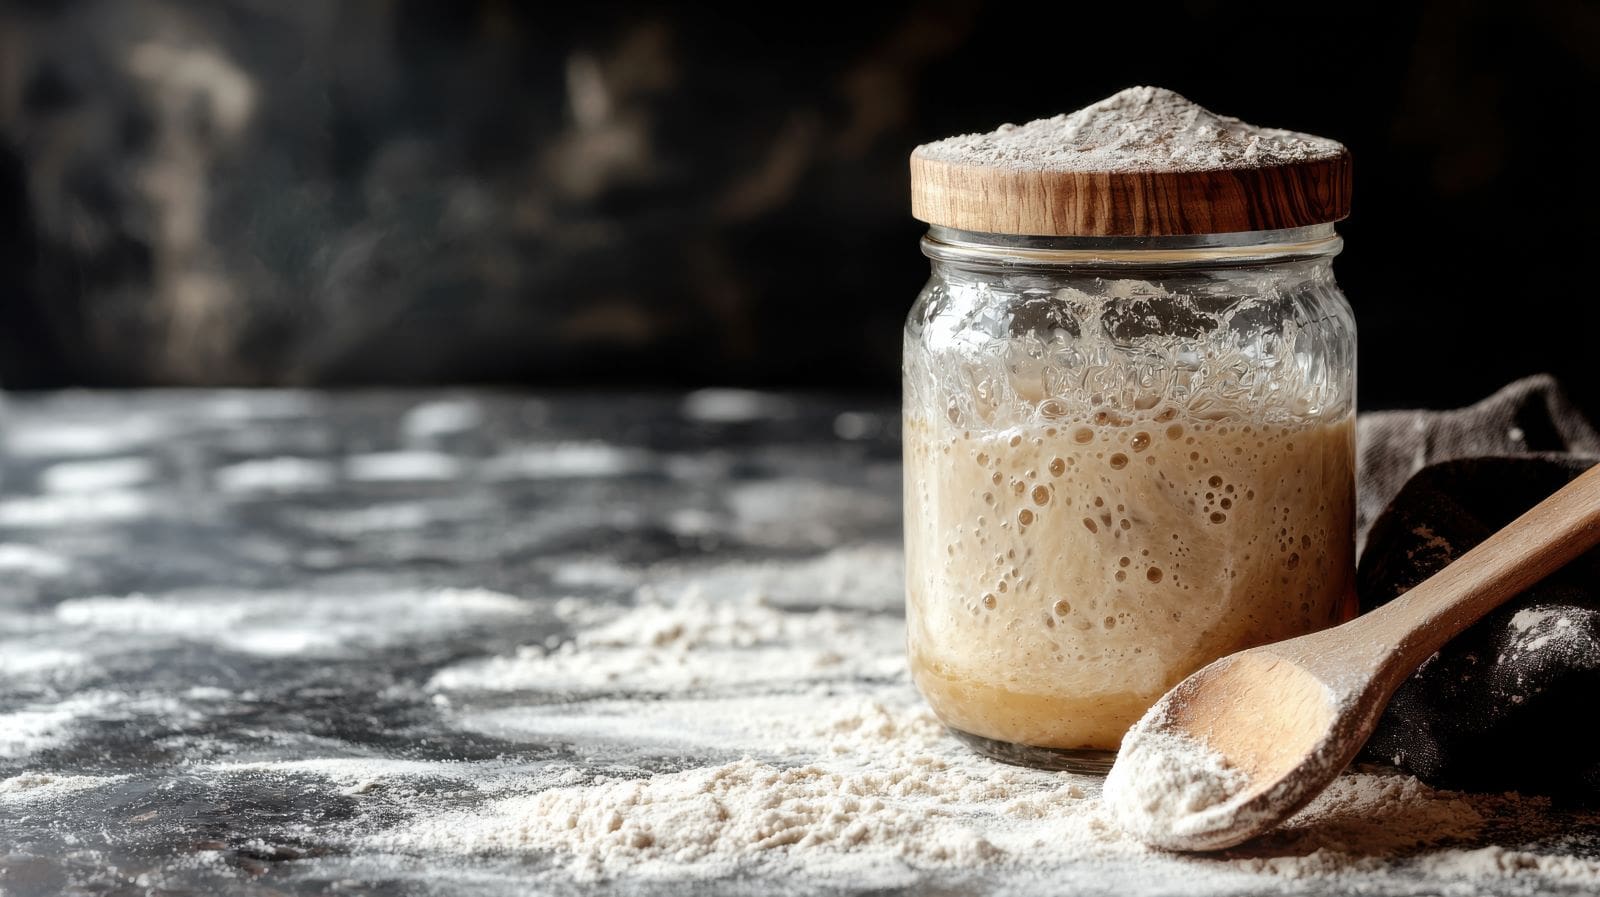
- Sourdough Starter: A mixture of flour and water fermented with wild yeast and lactic acid bacteria. It’s the heart of the sourdough process and what makes it unique compared to other breads.
These basic ingredients, when combined and properly fermented, create a loaf with a distinctively chewy texture and rich, slightly tangy taste.
The Sourdough Starter
At the core of sourdough is the starter. This living culture of yeast and bacteria needs time to grow and develop.
The starter is used in place of commercial yeast and can take several days to mature before it’s ready to use in a dough recipe. The starter is often “fed” with more flour and water to keep the microorganisms alive and active, helping to ferment the dough during the bread-making process.
When you learn how to knead sourdough bread, you’re not just mixing ingredients. You’re working with the effects of the starter, which has already begun to break down the flour, allowing gluten to form and gas to build up, resulting in a lighter, airier texture.
The Fermentation Process
Sourdough is different from most bread because of its fermentation. The wild yeast in the starter feeds on the sugars in the flour, producing carbon dioxide gas, which causes the dough to rise. Simultaneously, the bacteria in the starter produce lactic acid, which contributes to the bread’s distinctive tangy flavor.
During fermentation, the dough undergoes two primary stages:
- Bulk Fermentation: This is the first rise, where the dough rests and rises over several hours. During this stage, the dough’s texture improves as the gluten network strengthens. It’s during this phase that the dough requires attention on how to knead sourdough bread, using techniques like the stretch and fold method to develop the gluten.
- Proofing: After shaping the dough, it goes through a final rise before baking. This ensures the dough has developed enough air pockets for a light, fluffy texture.
Why Sourdough Has Its Signature Tang
The tangy flavor of sourdough comes from the lactic acid bacteria that naturally inhabit the starter. These bacteria thrive in the slightly acidic environment created by the fermentation process. The longer the dough ferments, the stronger the tang becomes, which is why some sourdough loaves can have a pleasantly sour taste while others are milder.
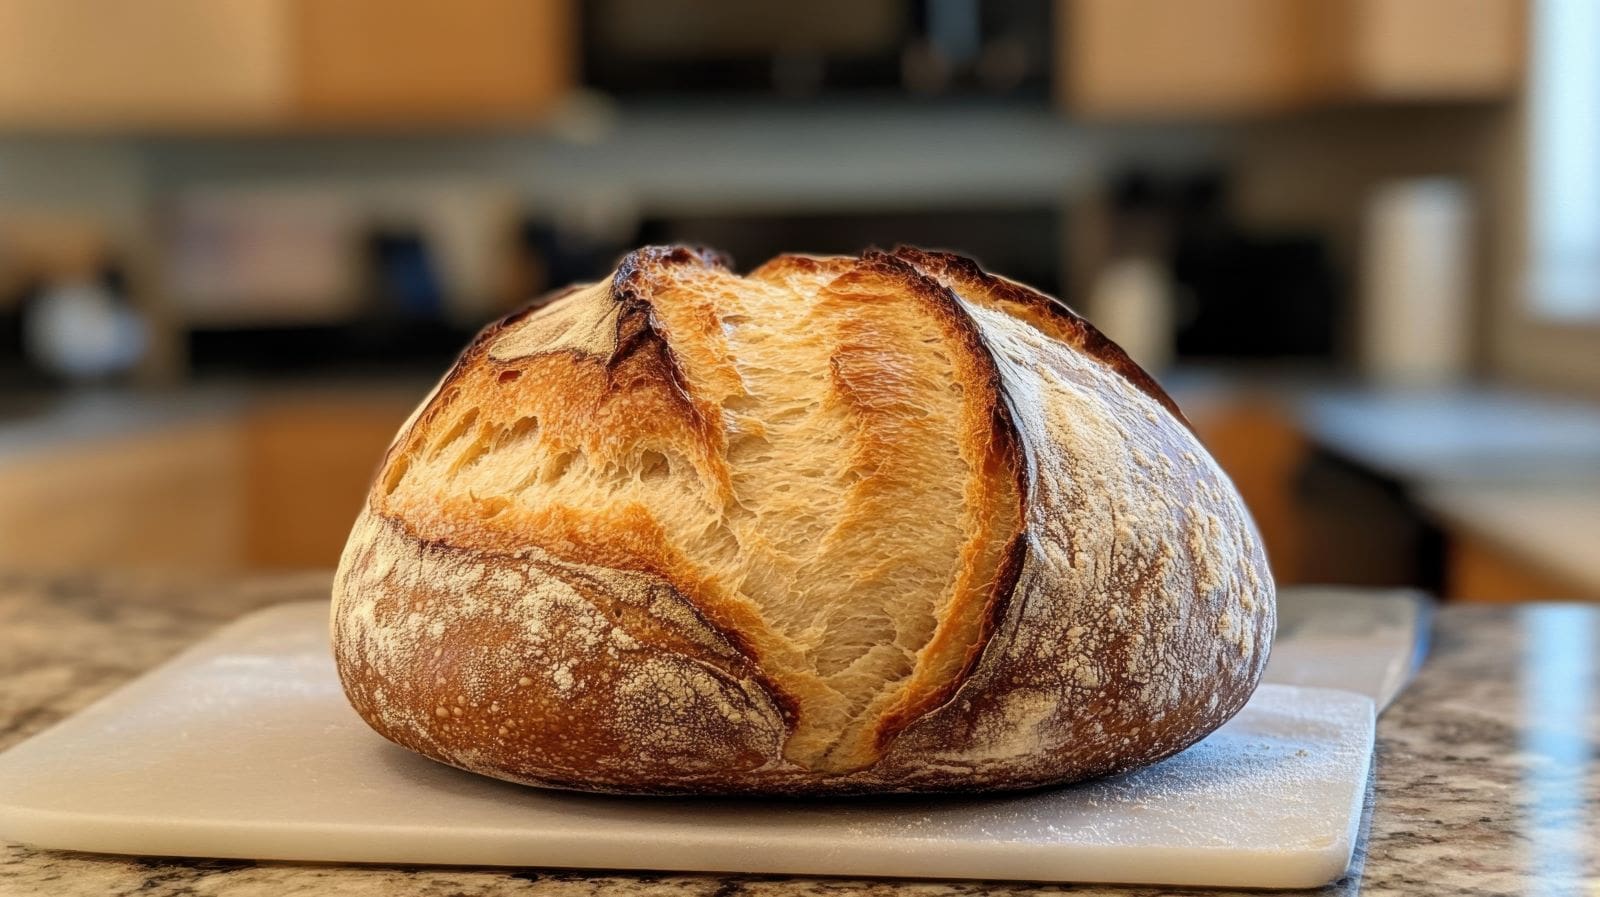
This unique flavor, combined with the chewy texture and slightly crispy crust, is what makes sourdough bread so beloved among bakers and bread enthusiasts.
How to Knead Sourdough Bread: The Role of Kneading
Understanding how to knead sourdough bread is crucial because kneading develops the dough’s gluten structure. When you knead the dough, you’re encouraging the formation of long gluten strands, which help trap the gases produced during fermentation.
While some recipes may call for less kneading, especially for wetter, high-hydration doughs, others may require a more thorough kneading process. It’s often during the kneading that you will begin to notice the dough transforming into something smoother and more elastic. This transformation is vital for the bread’s final texture, helping create a crumb that is both airy and firm, with a crunchy crust.
By now, you may have a better understanding of what sourdough bread is and why it’s different from other types of bread. The key to its success lies in the wild fermentation process, which gives it both flavor and texture.
Tools You’ll Need to Knead Sourdough Bread
Kneading sourdough bread is an art, and like any artist, you need the right tools to perfect your craft. While it might seem like all you need is your hands, a few specific tools can make the process smoother and more efficient. From mixing and kneading to shaping and baking, the tools you use can have a big impact on the final result. Let’s explore the essential tools that will help you when learning how to knead sourdough bread.
Mixing Bowl

Before you even start kneading, you need a good mixing bowl. This bowl will be where you combine your ingredients and let your dough rest during its first rise.
- Size: Choose a large bowl to give the dough plenty of room to grow. A 4 to 6-quart size should work well for most sourdough recipes.
- Material: Glass, ceramic, or stainless steel bowls are ideal. They are non-reactive, meaning they won’t alter the flavors of your dough. Avoid plastic if possible, as it can retain odors.
When you’re learning how to knead sourdough bread, using a sturdy, spacious bowl makes the whole process much easier. You’ll be able to mix and stretch the dough with confidence.
Dough Scraper
A dough scraper is an invaluable tool when it comes to handling sticky sourdough. This simple tool helps you lift, fold, and divide the dough without making too much of a mess.
- Versatility: A dough scraper isn’t just for scraping dough off the countertop. It also helps you shape the dough into a ball or transfer it to your baking vessel.
- Material: Most dough scrapers are made of plastic or stainless steel, which makes cleaning them after each use a breeze.
With a dough scraper in hand, you’ll be able to handle your dough with more control, especially when working with wet, sticky sourdough.
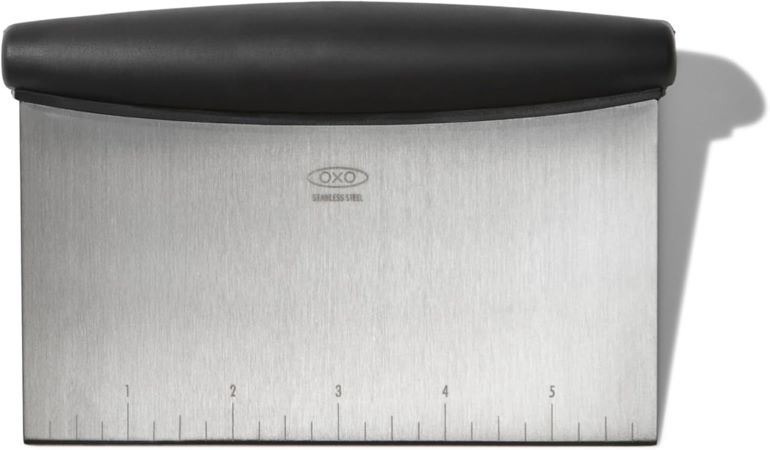
Bench Knife
A bench knife is similar to a dough scraper but designed with a wider, more flexible blade. It’s useful for cutting and shaping the dough, especially when you need to divide the dough into portions for shaping or proofing.
- Size and Flexibility: A bench knife with a wide, flat surface helps divide the dough evenly and gives you greater control when shaping.
- Ease of Use: It’s perfect for scraping down sticky dough from the counter without leaving a mess behind.
Having a bench knife ensures you can maintain the right structure when dividing your dough, making it easier to manage multiple loaves or shape the dough into the perfect round before baking.
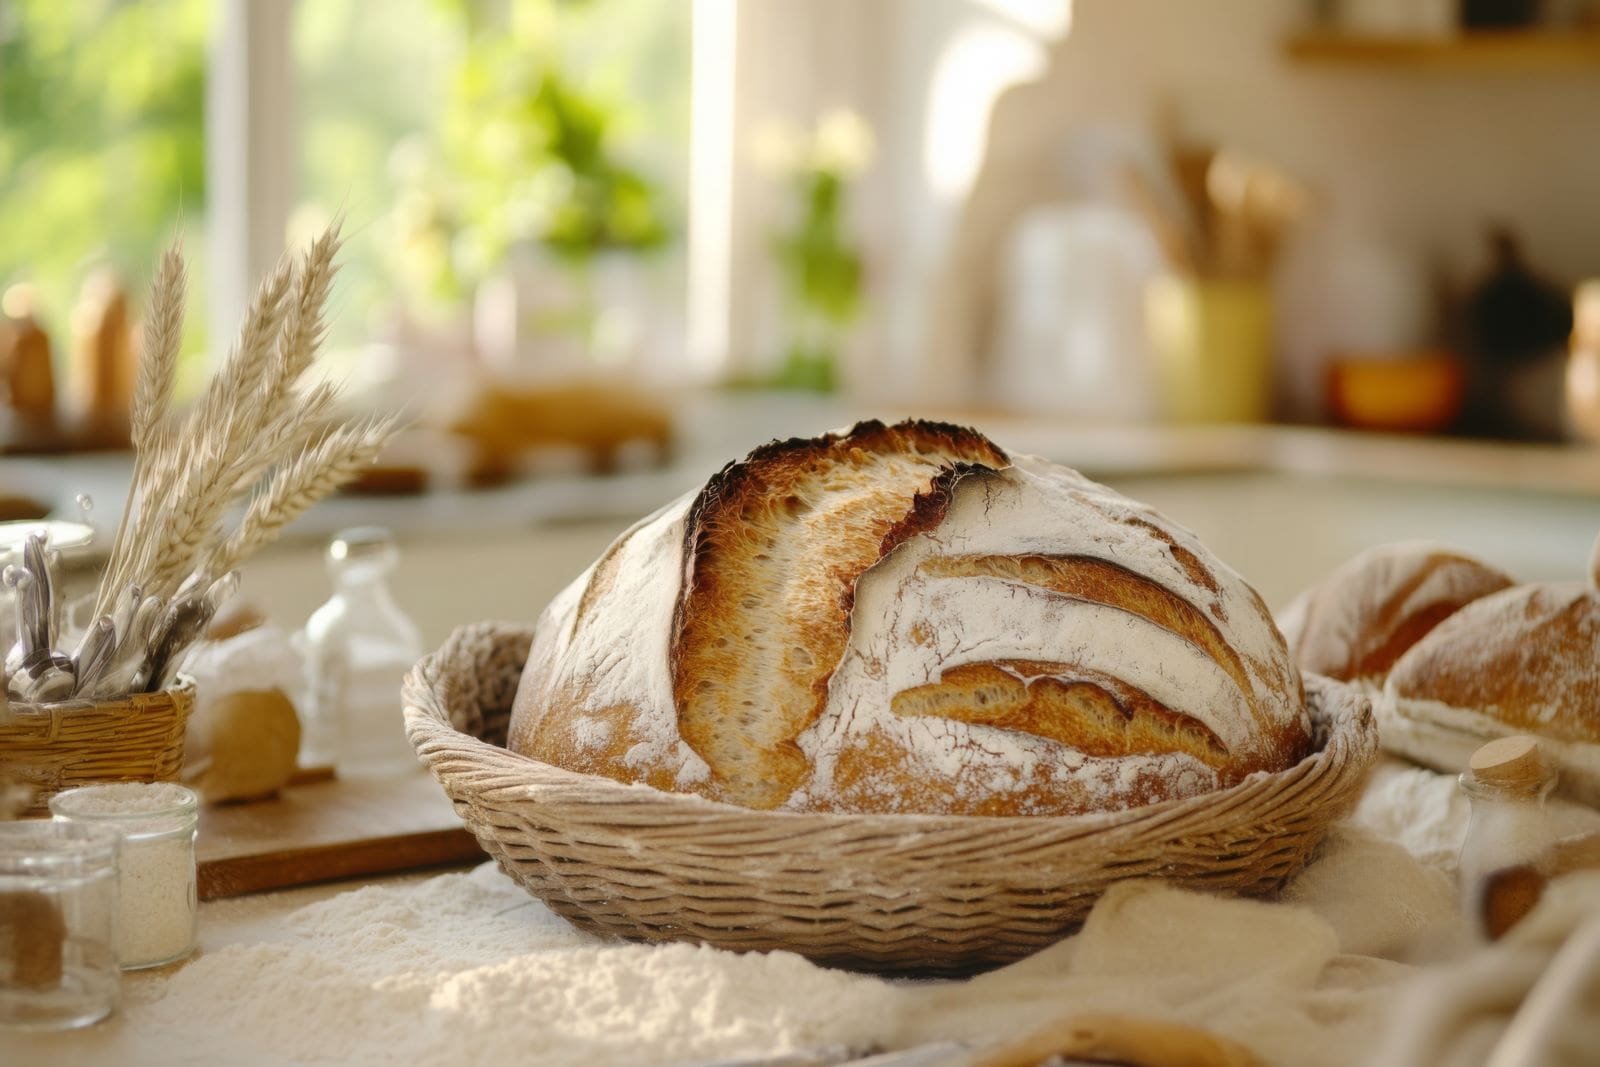
Proofing Basket
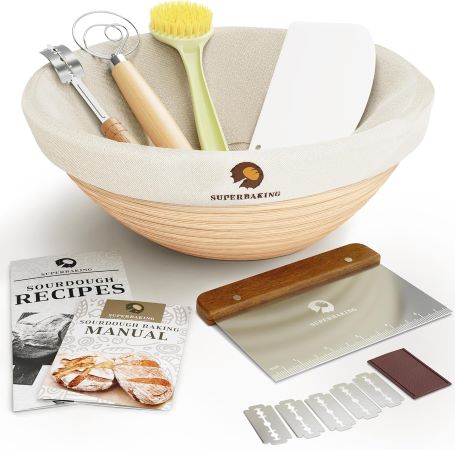
Once you’ve finished kneading sourdough, it’s time to let it rise. A proofing basket, or banneton, is designed to help your dough hold its shape during the final rise.
- Shape: Banneton baskets are traditionally round or oval and are often made from rattan or cane. They help the dough maintain its shape and allow airflow to prevent the dough from getting too soggy.
- Cloth Lining: Some proofing baskets come with a cloth liner, which helps absorb excess moisture and keep the dough from sticking.
If you’re serious about sourdough, investing in a proofing basket can help elevate the final texture and appearance of your loaf.
Digital Scale
Baking sourdough bread isn’t just an art—it’s also a science. Using precise measurements ensures that you get the right dough consistency and hydration level. A digital scale allows you to weigh your ingredients accurately, ensuring consistency in your results.
- Accuracy: Flour can be compacted in different ways, and measuring by volume can be inconsistent. A scale gives you an accurate weight, which is especially important for high-hydration doughs.
- Portion Control: If you’re making multiple loaves or want to ensure even dough portions, a digital scale helps you divide the dough evenly.
Having a digital scale allows you to follow your sourdough recipe to the letter, ensuring that you get the right balance of ingredients every time you bake.
Kitchen Towel or Plastic Wrap
After kneading sourdough, the dough needs time to rise. You’ll need a kitchen towel or plastic wrap to cover the bowl or proofing basket to keep the dough moist and warm during this process.
- Protection: A damp kitchen towel can help maintain moisture while preventing the dough from drying out. Plastic wrap is also great at trapping heat, speeding up fermentation.
- Prevention of Skin Formation: Covering the dough helps prevent a dry, hard skin from forming on the surface as it rises.
Whether you’re using a towel or plastic wrap, this step is essential to ensure your dough has the right environment to ferment properly.
Dutch Oven or Baking Stone
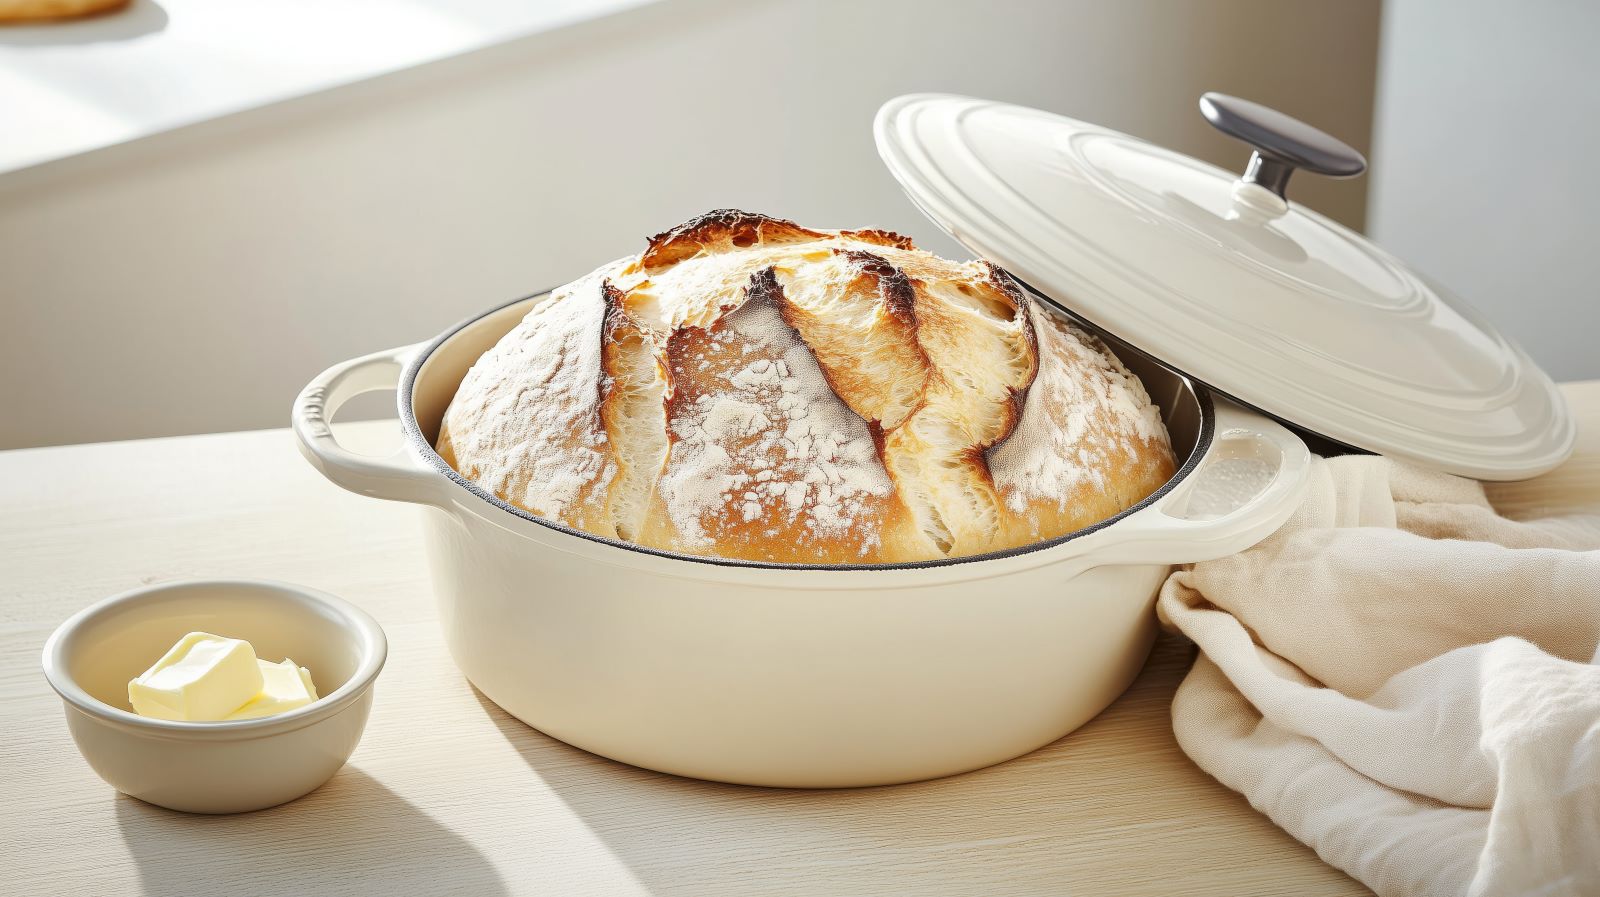
While kneading sourdough is crucial, the baking process is where the dough really comes to life. A Dutch oven or baking stone is one of the best ways to bake sourdough, creating a steamy environment that promotes an excellent rise and crispy crust.
- Dutch Oven: A heavy cast iron pot that traps steam, helping create the perfect crust and texture. It’s ideal for baking sourdough because it retains heat well and evenly distributes it throughout the dough.
- Baking Stone: If you prefer a more traditional oven setup, a baking stone works by absorbing heat and creating a crisp, even bake for your bread. It’s important to preheat the stone before placing your dough on it.
Both tools allow for the development of a beautifully golden-brown, crusty sourdough loaf with the perfect crumb. If you want your bread to rise properly and bake evenly, either of these options is an excellent investment.
Sharp Blade or Lame
A sharp blade or lame (a special type of razor blade holder) is essential for scoring your dough before baking. Scoring creates slashes on the surface of the dough, allowing it to expand in a controlled way during baking.
- Control: A lame allows you to score the dough cleanly, controlling how the dough expands in the oven.
- Precision: The sharp blade helps prevent the dough from ripping or deflating, and it creates beautiful designs on the surface of your loaf.
Whether you’re scoring for practical or decorative reasons, using the right blade ensures that your sourdough bakes evenly and looks stunning.
Step-by-Step Guide on How to Knead Sourdough Bread
Kneading sourdough bread is one of the most important skills in bread-making. It shapes the dough, develops the gluten, and contributes to the overall texture and rise of the bread. While kneading may seem like a labor-intensive task, it’s incredibly satisfying once you get the hang of it. Let’s walk through the process of kneading sourdough bread from start to finish, ensuring you understand each stage thoroughly.
1. Gather Your Ingredients and Tools
Before diving into the kneading process, it’s essential to have all your ingredients and tools ready. This preparation makes the process smoother and more organized.
Start with your basic ingredients: active sourdough starter, water, flour, and salt. Make sure your starter is bubbly and active, as this will help with the rise. You’ll also need a clean, flat surface for kneading, like a countertop or large cutting board. Have a dough scraper or bench knife nearby to help handle the dough. A damp cloth can also be useful to cover the dough while it rests.
2. Mix the Dough
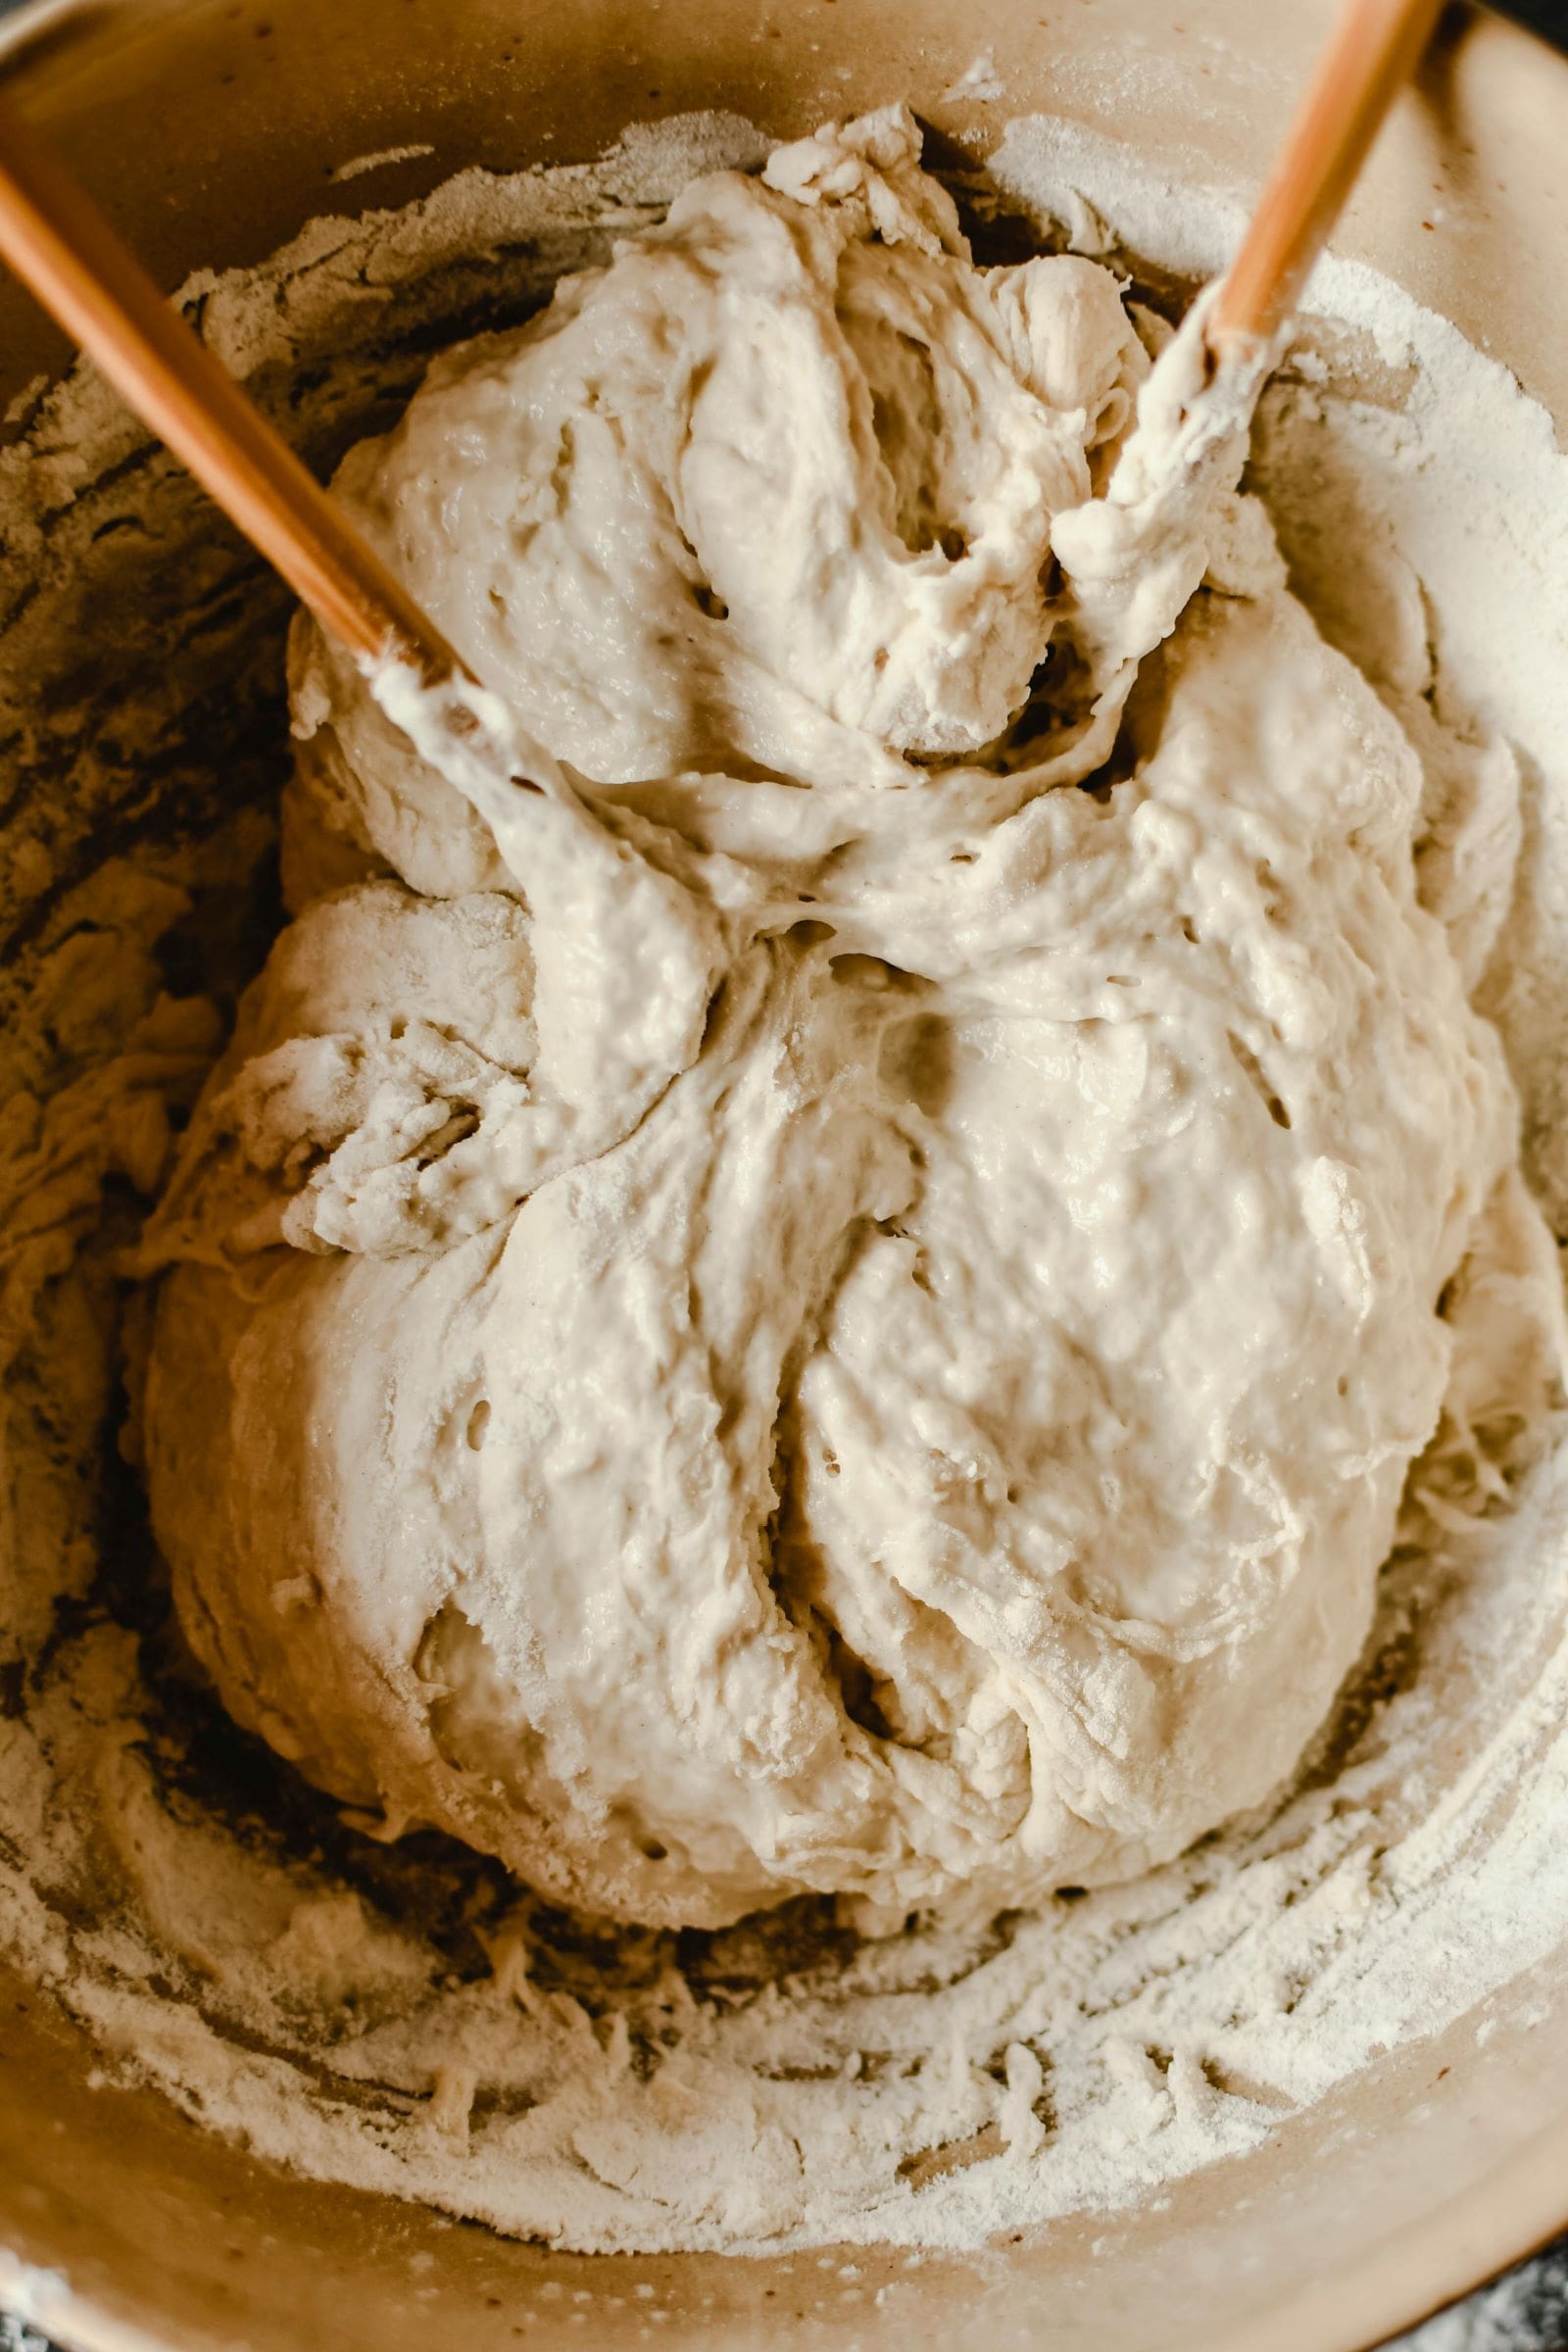
To begin kneading, you need to mix the ingredients into a dough. In a large mixing bowl, combine the flour, salt, water, and sourdough starter. Stir the ingredients together until they form a shaggy, rough dough. At this point, don’t worry about making it perfect; the goal is just to get everything combined.
Once the dough looks evenly mixed, let it rest for 20 minutes. This short rest, called the autolyse, allows the flour to fully absorb the water, making the kneading process easier.
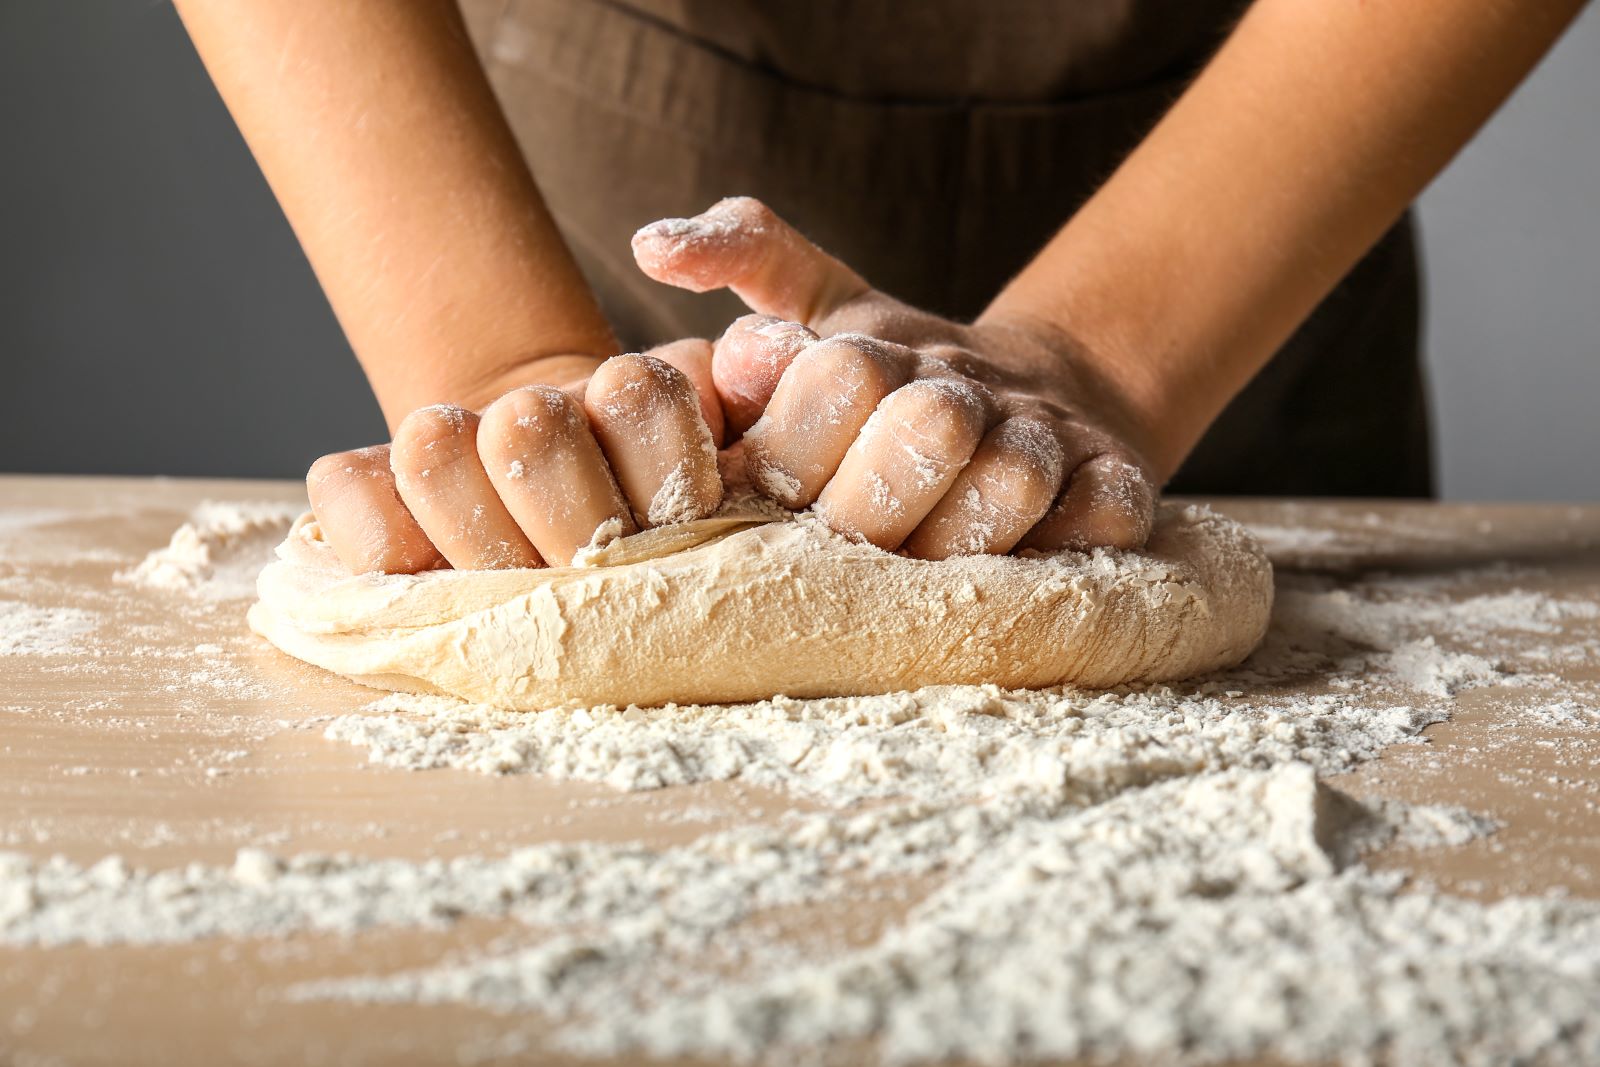
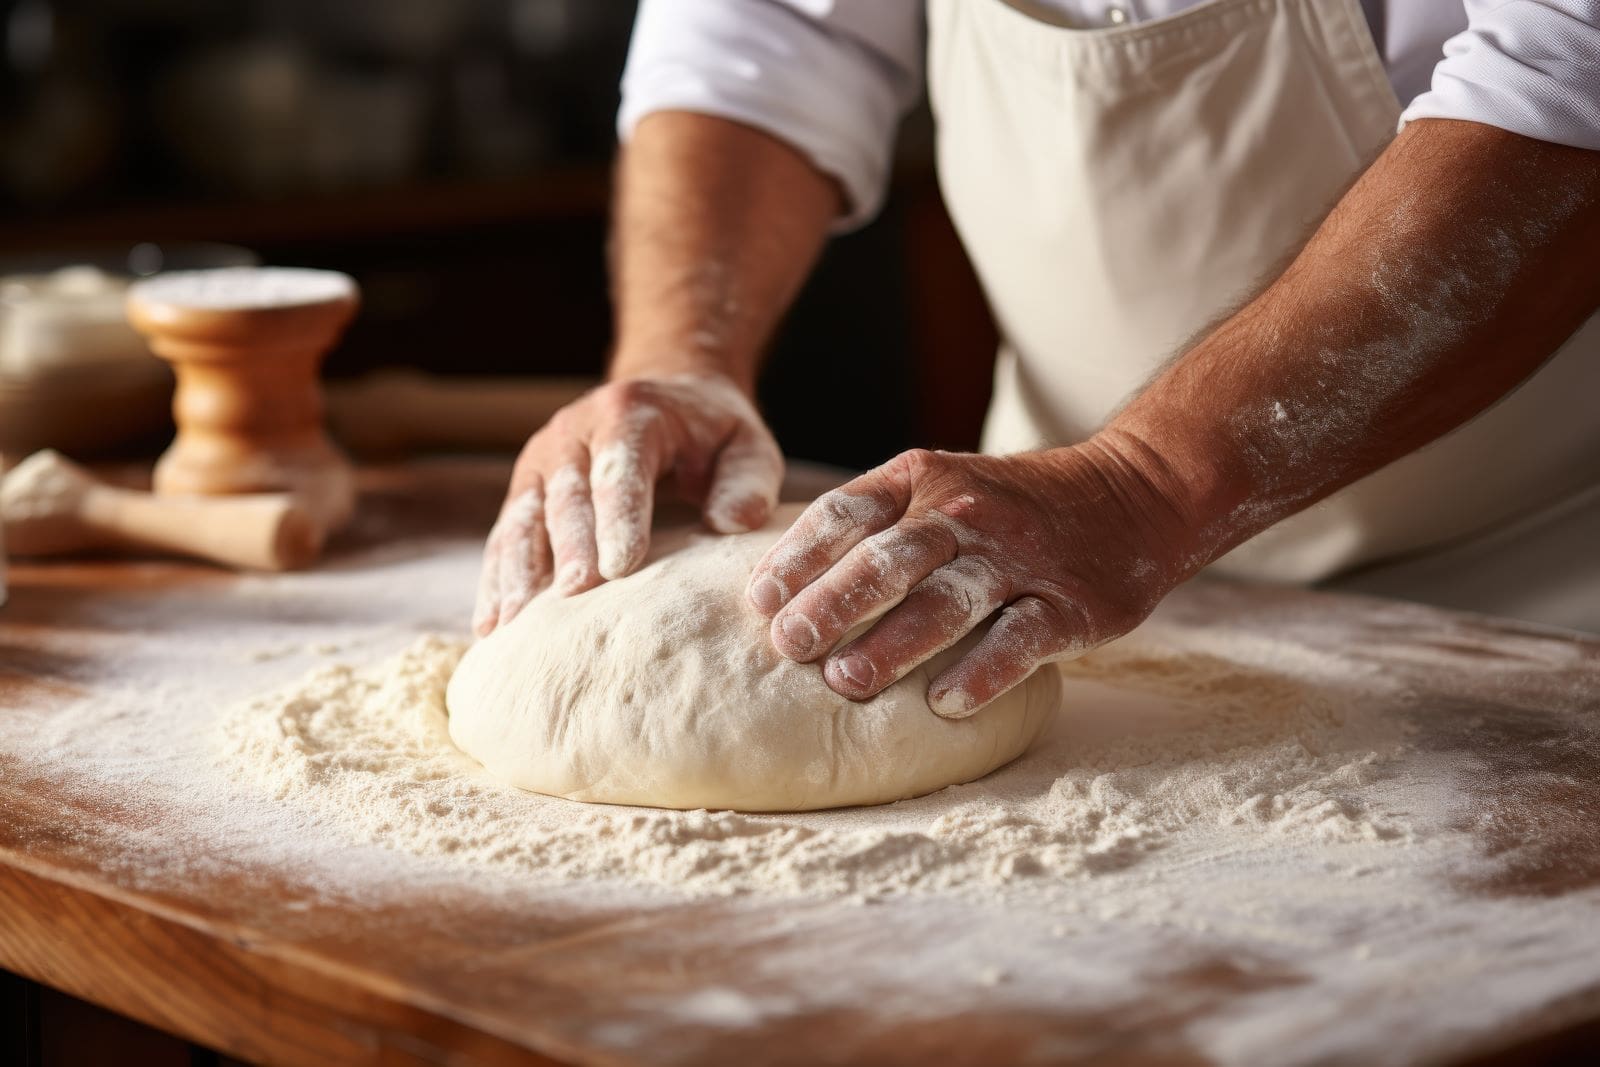
3. Begin the Kneading Process
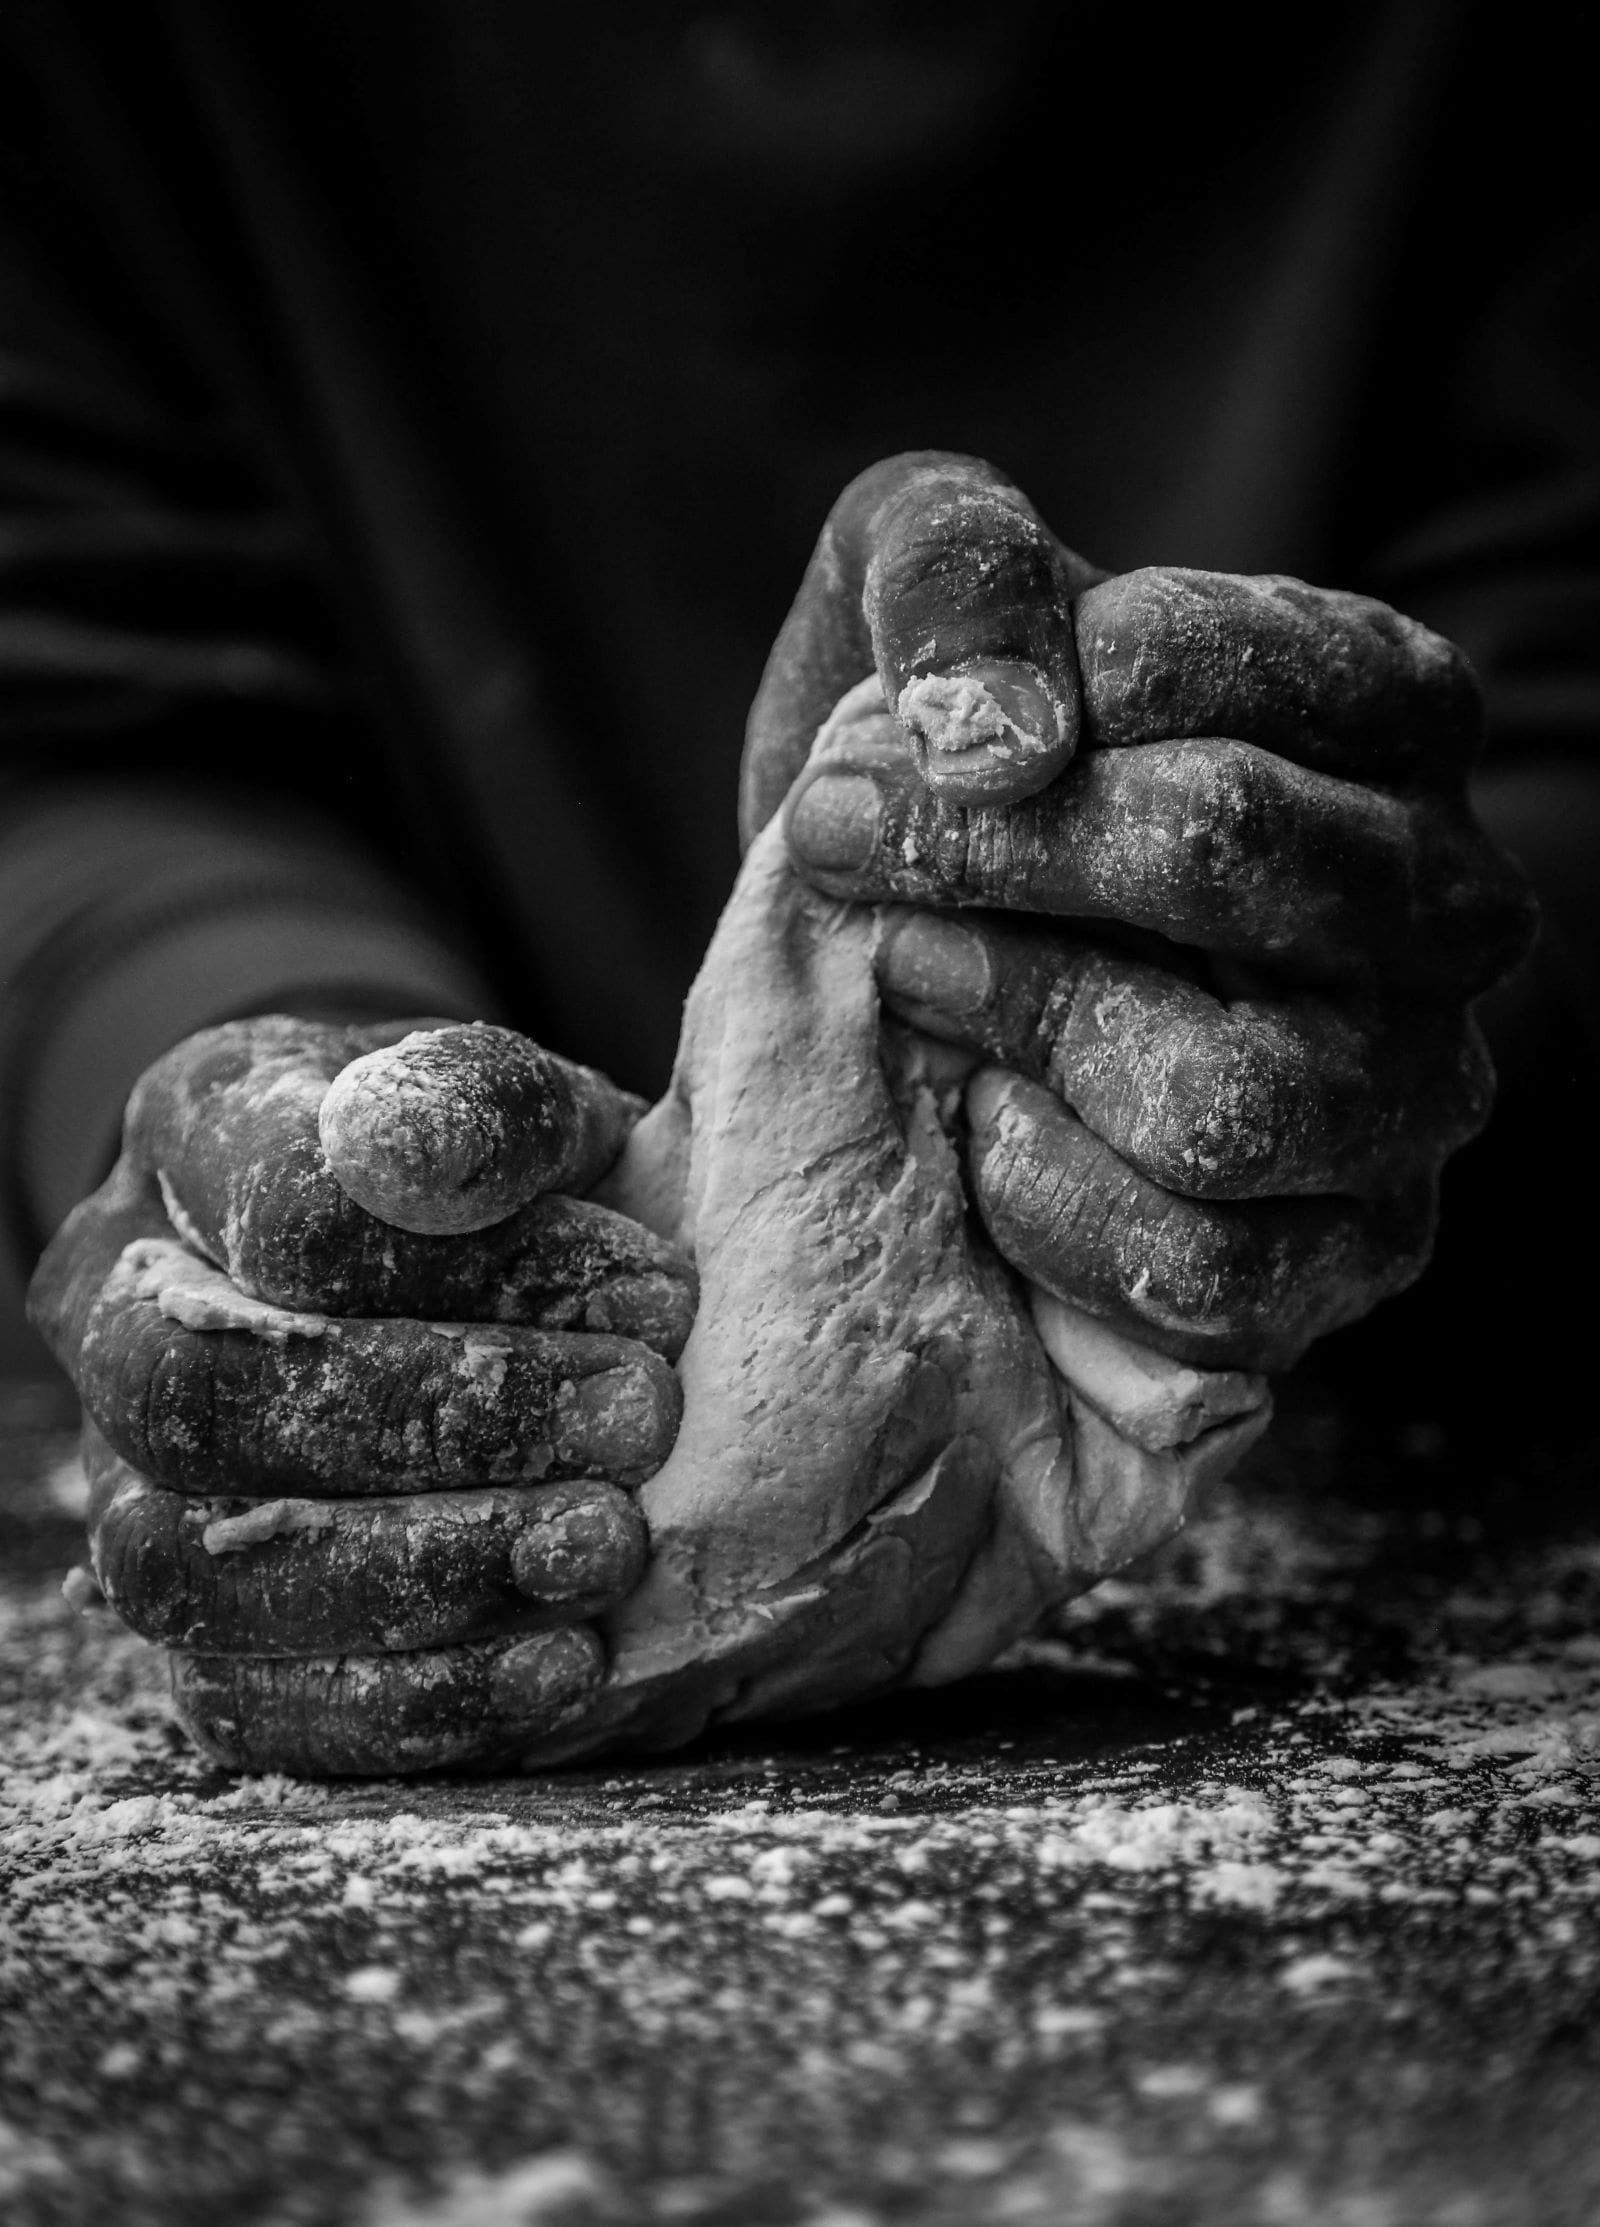
Now comes the fun part—kneading the dough. Kneading is all about developing the gluten network in the dough, which is essential for the texture and structure of your bread.
Start by pressing the palms of your hands into the dough, pushing it forward. After each push, fold the dough back toward you and rotate it 90 degrees. Keep repeating this folding and turning motion until the dough begins to feel smoother and more elastic. It might be sticky at first, but as you knead, it will become less tacky and more manageable. The entire process should take about 8-10 minutes, but don’t rush it—patience is key.
If the dough becomes too sticky, you can sprinkle a bit of flour on the work surface. However, be cautious about adding too much flour, as it can alter the dough’s hydration and texture.
4. Stretch and Fold Method (Optional)
If you find traditional kneading too intense, especially with high-hydration dough, you can use the stretch and fold method. This technique allows you to develop the gluten without overworking the dough.
After an initial kneading, let the dough rest for 30 minutes. Then, instead of continuing to knead, perform a stretch and fold. Gently stretch one side of the dough and fold it over toward the center. Turn the dough 90 degrees and repeat the stretch and fold on each side. Continue this process every 30 minutes for 2-3 hours. This will slowly build up the dough’s structure while keeping it relaxed and less sticky.
5. Test the Dough’s Readiness
Once you feel the dough is well-kneaded, it’s time to check its readiness. A good test is the windowpane test. Take a small piece of dough and gently stretch it between your fingers. If it forms a thin, translucent membrane without tearing, your dough is ready. If it tears, continue kneading and checking until the dough reaches this point.
This test is crucial because it ensures that the gluten has fully developed, which will allow your bread to rise properly and have a light, airy crumb.
6. Let the Dough Rest (First Rise)
After kneading, place the dough in a lightly oiled bowl and cover it with a damp cloth or plastic wrap to prevent it from drying out. This is when the magic happens. Over the next 3-4 hours, the dough will ferment, rise, and develop complex flavors.
During this first rise, you can perform additional stretch and folds every 30 minutes to strengthen the dough further. If the dough is rising well and showing signs of expanding, let it continue resting until it’s nearly doubled in size. If you’re not in a rush, you can also let the dough rest overnight in the refrigerator for a slower fermentation, which will result in a more flavorful loaf.
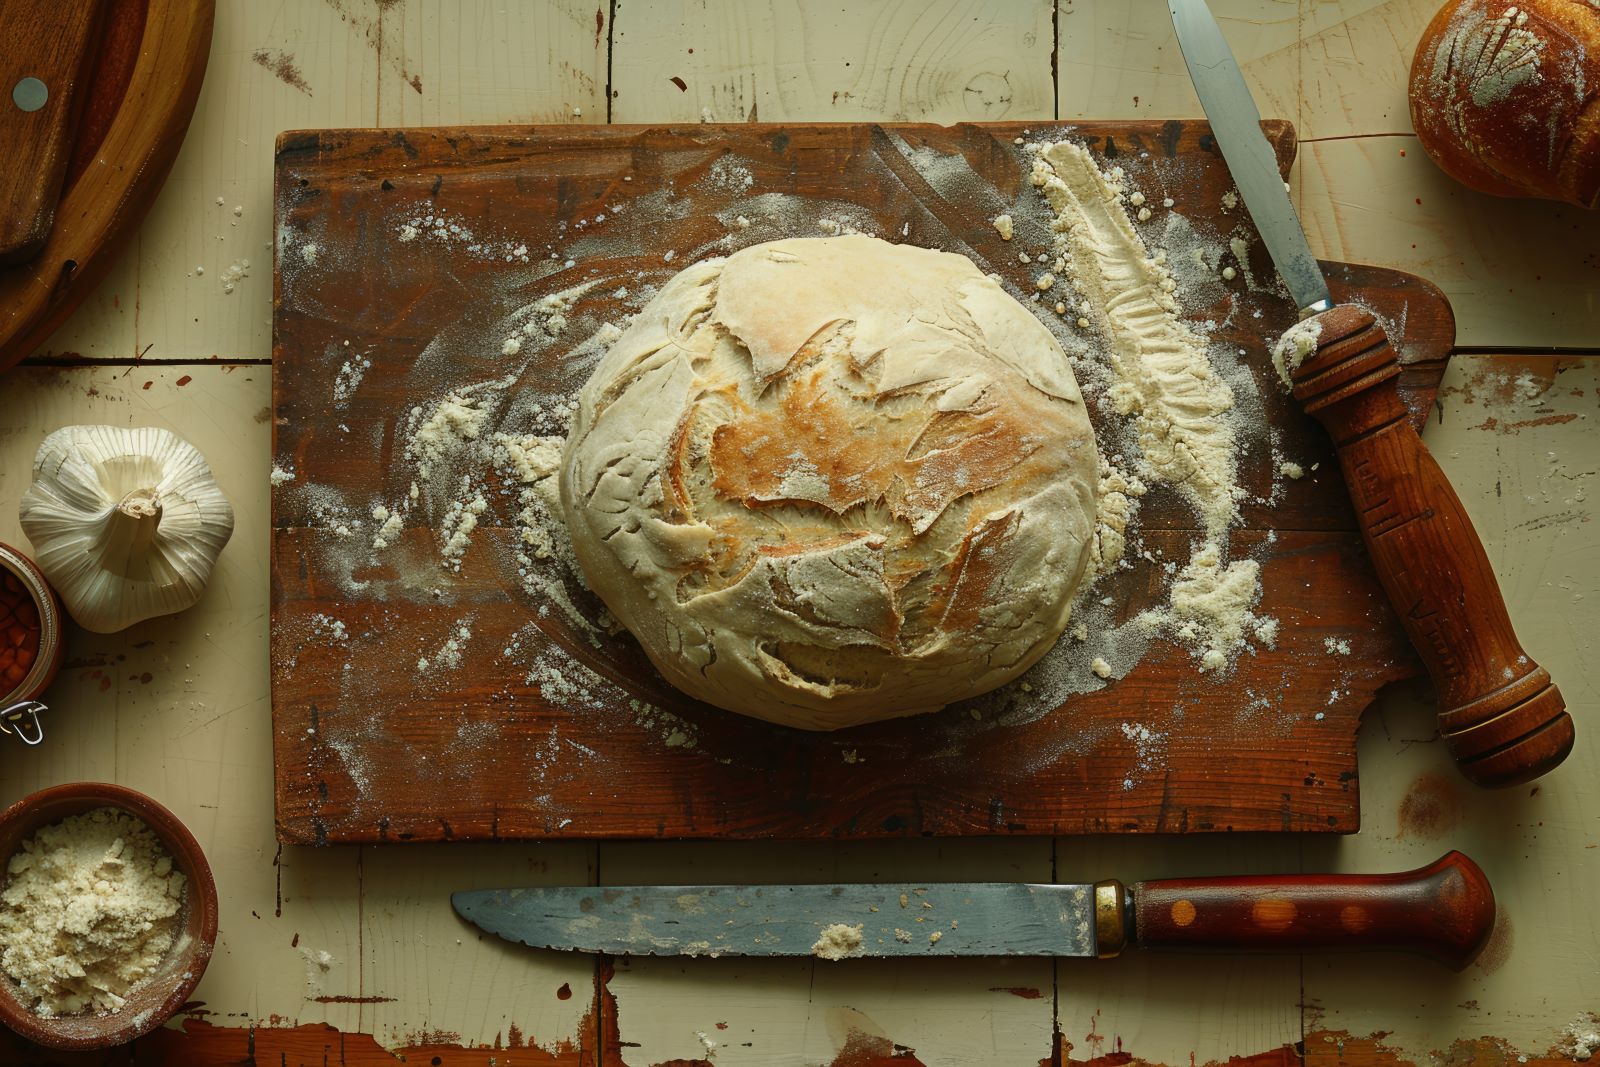
7. Shape the Dough
Once the dough has completed its first rise, it’s time to shape it into its final form. This step involves turning the dough out onto a lightly floured surface. Gently fold the edges toward the center to create a round or oval shape. Use your hands to gently tighten the dough, forming surface tension. This step is essential for the final rise and gives the bread a nice shape for baking.
8. Final Rise (Proofing)
After shaping, let the dough rest for its final rise, which can take anywhere from 1-3 hours. During this time, the dough will continue to expand and develop flavor. For a more intense flavor and texture, you can also refrigerate the dough for a slower, overnight proof.
You’ll know it’s ready when the dough has visibly risen and springs back slightly when you press it gently with your finger. If the dough doesn’t spring back, it’s likely over-proofed, and if it springs back too much, it’s under-proofed.
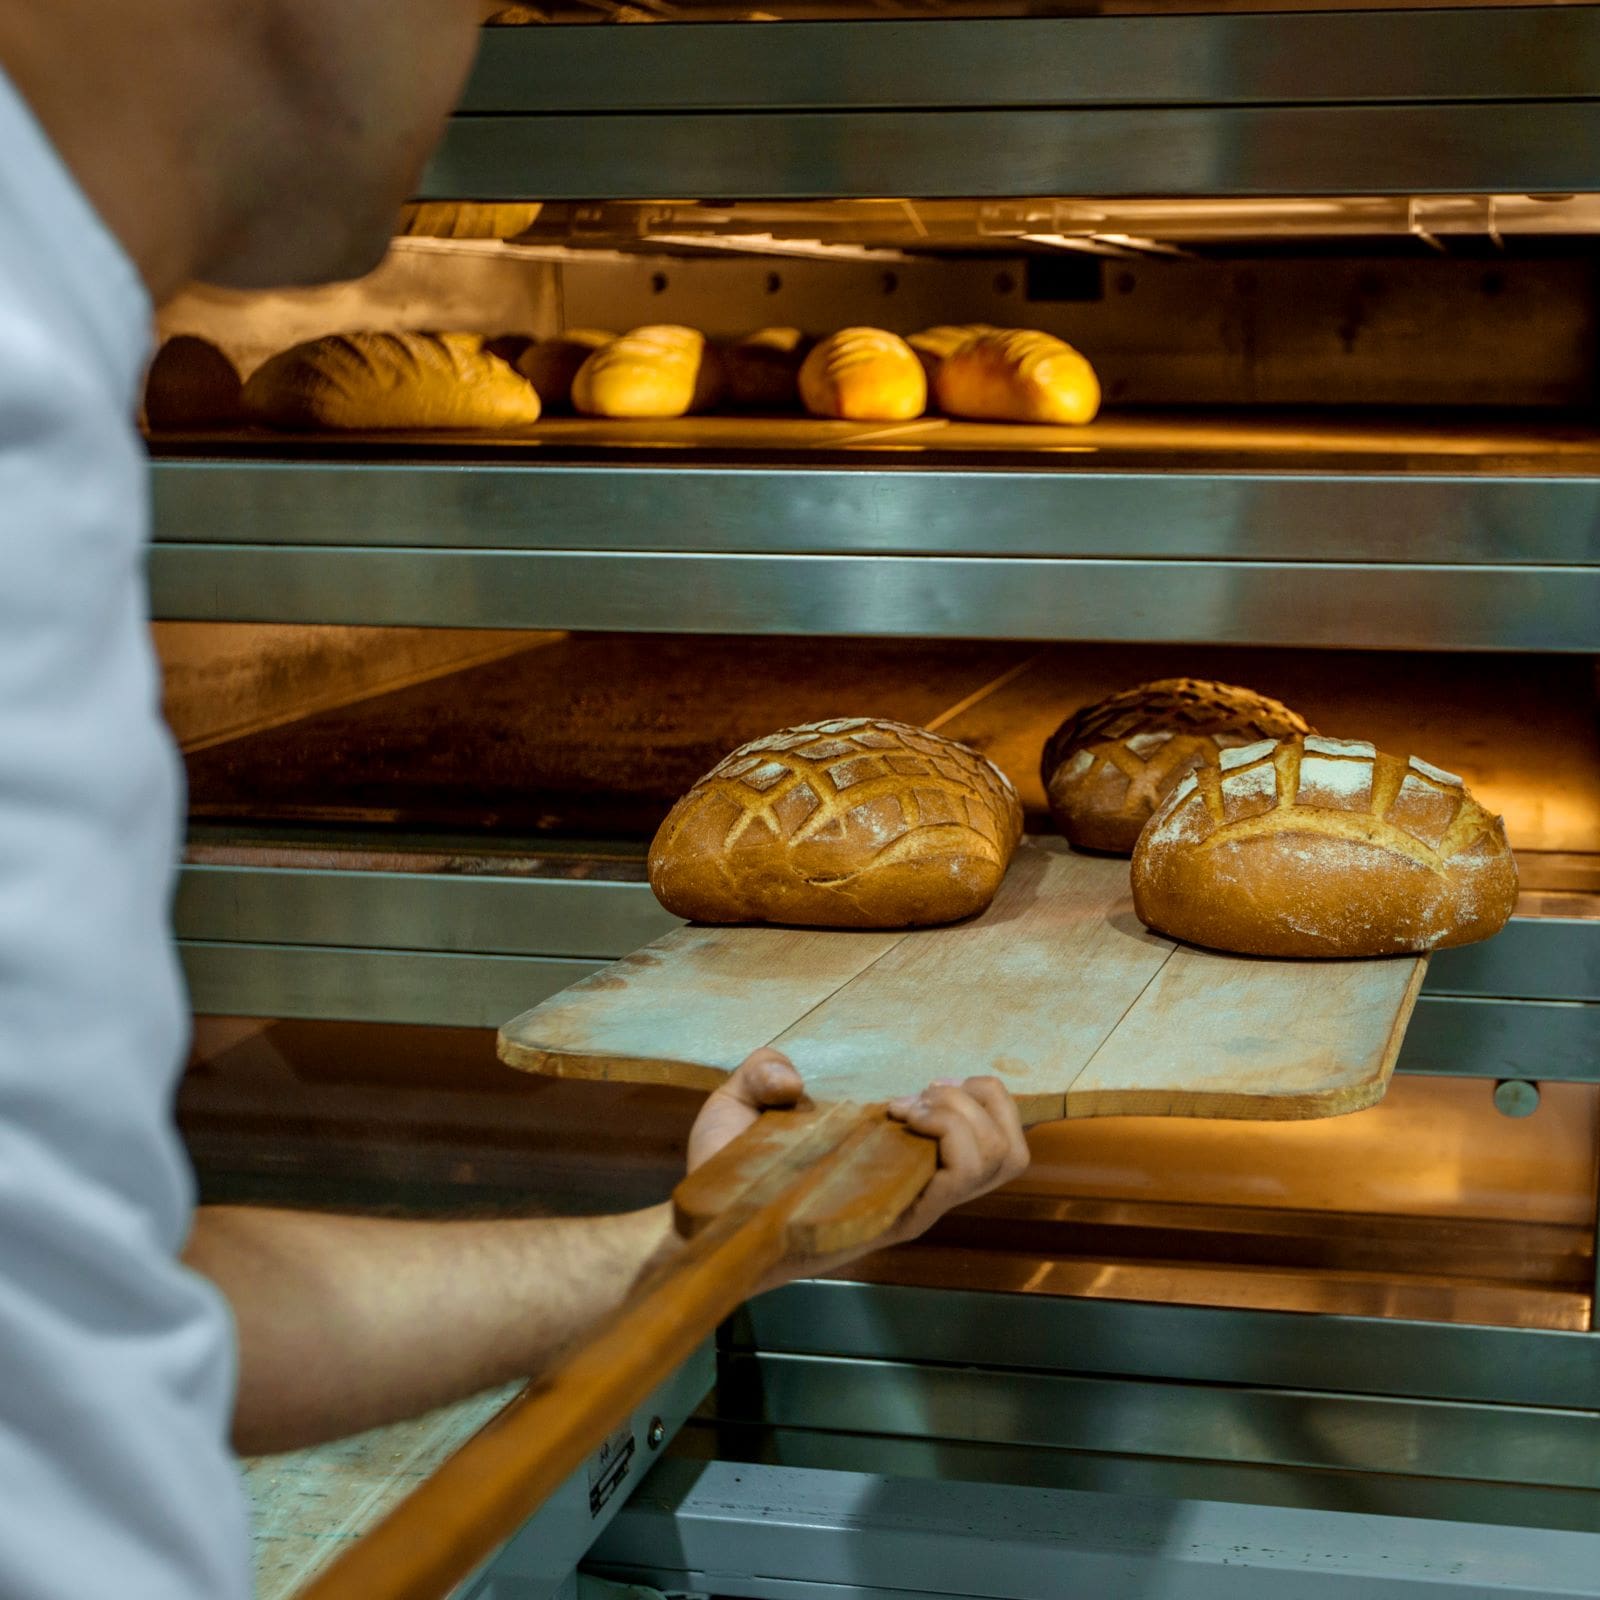
9. Bake the Bread
Once the dough has fully proofed, it’s time to bake. Preheat your oven to 475°F (245°C). If you’re using a Dutch oven, place it inside to heat up as well. When the oven is hot, transfer your dough into the Dutch oven or onto a baking stone. Score the dough with a sharp blade or lame to allow it to expand while baking.
Bake for 30-40 minutes, or until the crust is golden-brown and the internal temperature of the bread reaches around 200°F (93°C). If you’re using a Dutch oven, you can remove the lid halfway through the baking time to allow the bread to develop a crispy crust.
In Summary
Learning how to knead sourdough bread is a rewarding process that takes patience and practice. From mixing the ingredients to shaping and baking, each step builds toward a delicious, homemade loaf. Whether you opt for traditional kneading or the stretch and fold method, what matters most is that you give the dough the time it needs to develop flavor, texture, and structure. With this step-by-step guide, you’ll be well on your way to creating your perfect sourdough loaf. Enjoy the process and the wonderful aroma of fresh-baked bread filling your home!
Different Techniques for Kneading Sourdough Dough
Mastering how to knead sourdough bread means understanding different techniques that influence gluten development, dough texture, and final loaf quality. Each method offers unique benefits, making it easier to achieve the perfect consistency for your sourdough.
Traditional Hand Kneading
Hand kneading is the most classic method, providing full control over the dough’s elasticity and texture. This technique involves stretching and folding the dough repeatedly to build a strong gluten network.
- Process: Press the dough with the heel of your hand, stretch it forward, then fold it back. Rotate and repeat.
- Best for: Bakers who enjoy a hands-on approach and want to feel gluten development firsthand.
- Tip: Avoid adding extra flour, as it can alter hydration and lead to a dense loaf.
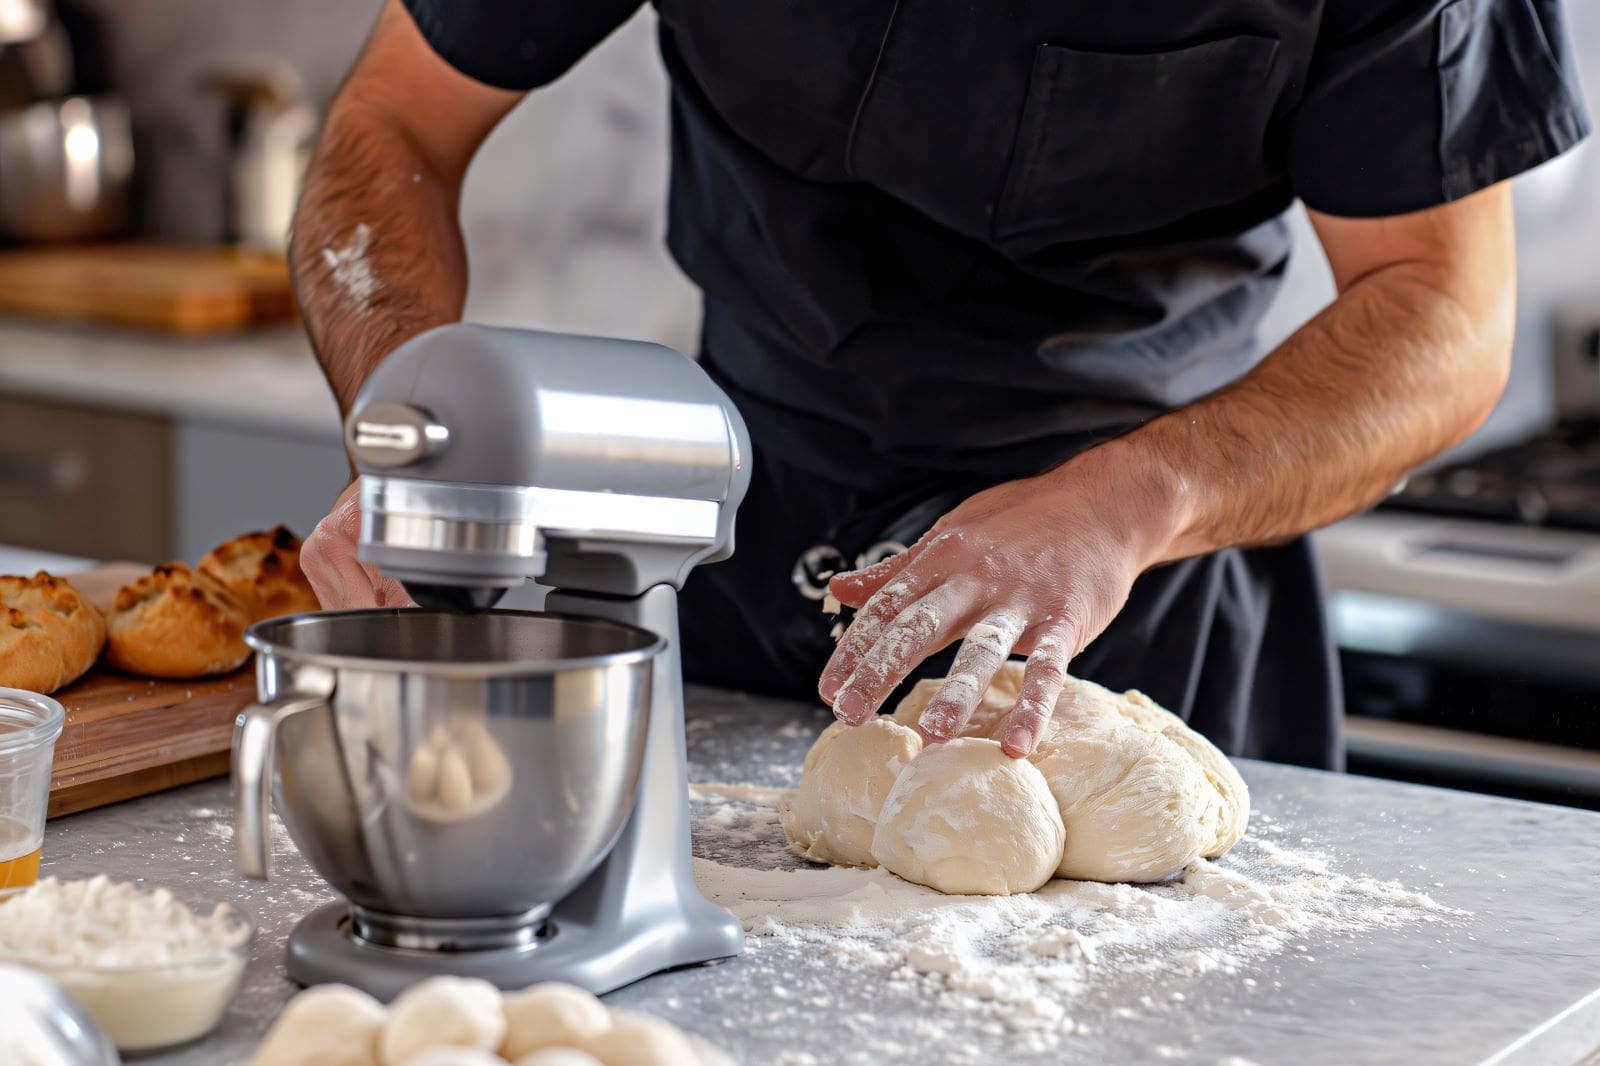
Using a Stand Mixer
For those who prefer a hands-off approach, a stand mixer for bread dough, with a dough hook attachment can handle the kneading process efficiently.
- Process: Mix the dough on a low speed for 5-7 minutes until it becomes smooth and elastic. Be careful not to over-knead, as this can make the dough too tight.
- Best for: Bakers who want a more convenient method without extensive manual work.
- Tip: Stop mixing once the dough passes the “windowpane test” to avoid overworking the gluten.
Choosing the Right Stand Mixer for Bread Dough
Not all stand mixers are created equal when it comes to kneading sourdough. A powerful motor, sturdy dough hook, and a large-capacity bowl make a significant difference in handling thick, elastic dough.
If you’re looking for the best stand mixers for bread dough, check out this guide on top stand mixers to find one that suits your baking needs:
Stretch and Fold Method
This gentle technique allows gluten to develop over time, making it an excellent alternative to traditional kneading. It works especially well for high-hydration sourdough.
- Process: Grab one side of the dough, stretch it upward, then fold it over itself. Rotate and repeat every 30 minutes during bulk fermentation.
- Best for: Those who prefer minimal effort and a more relaxed approach to kneading.
- Tip: Keep your hands slightly wet to prevent sticking and ensure smooth handling.
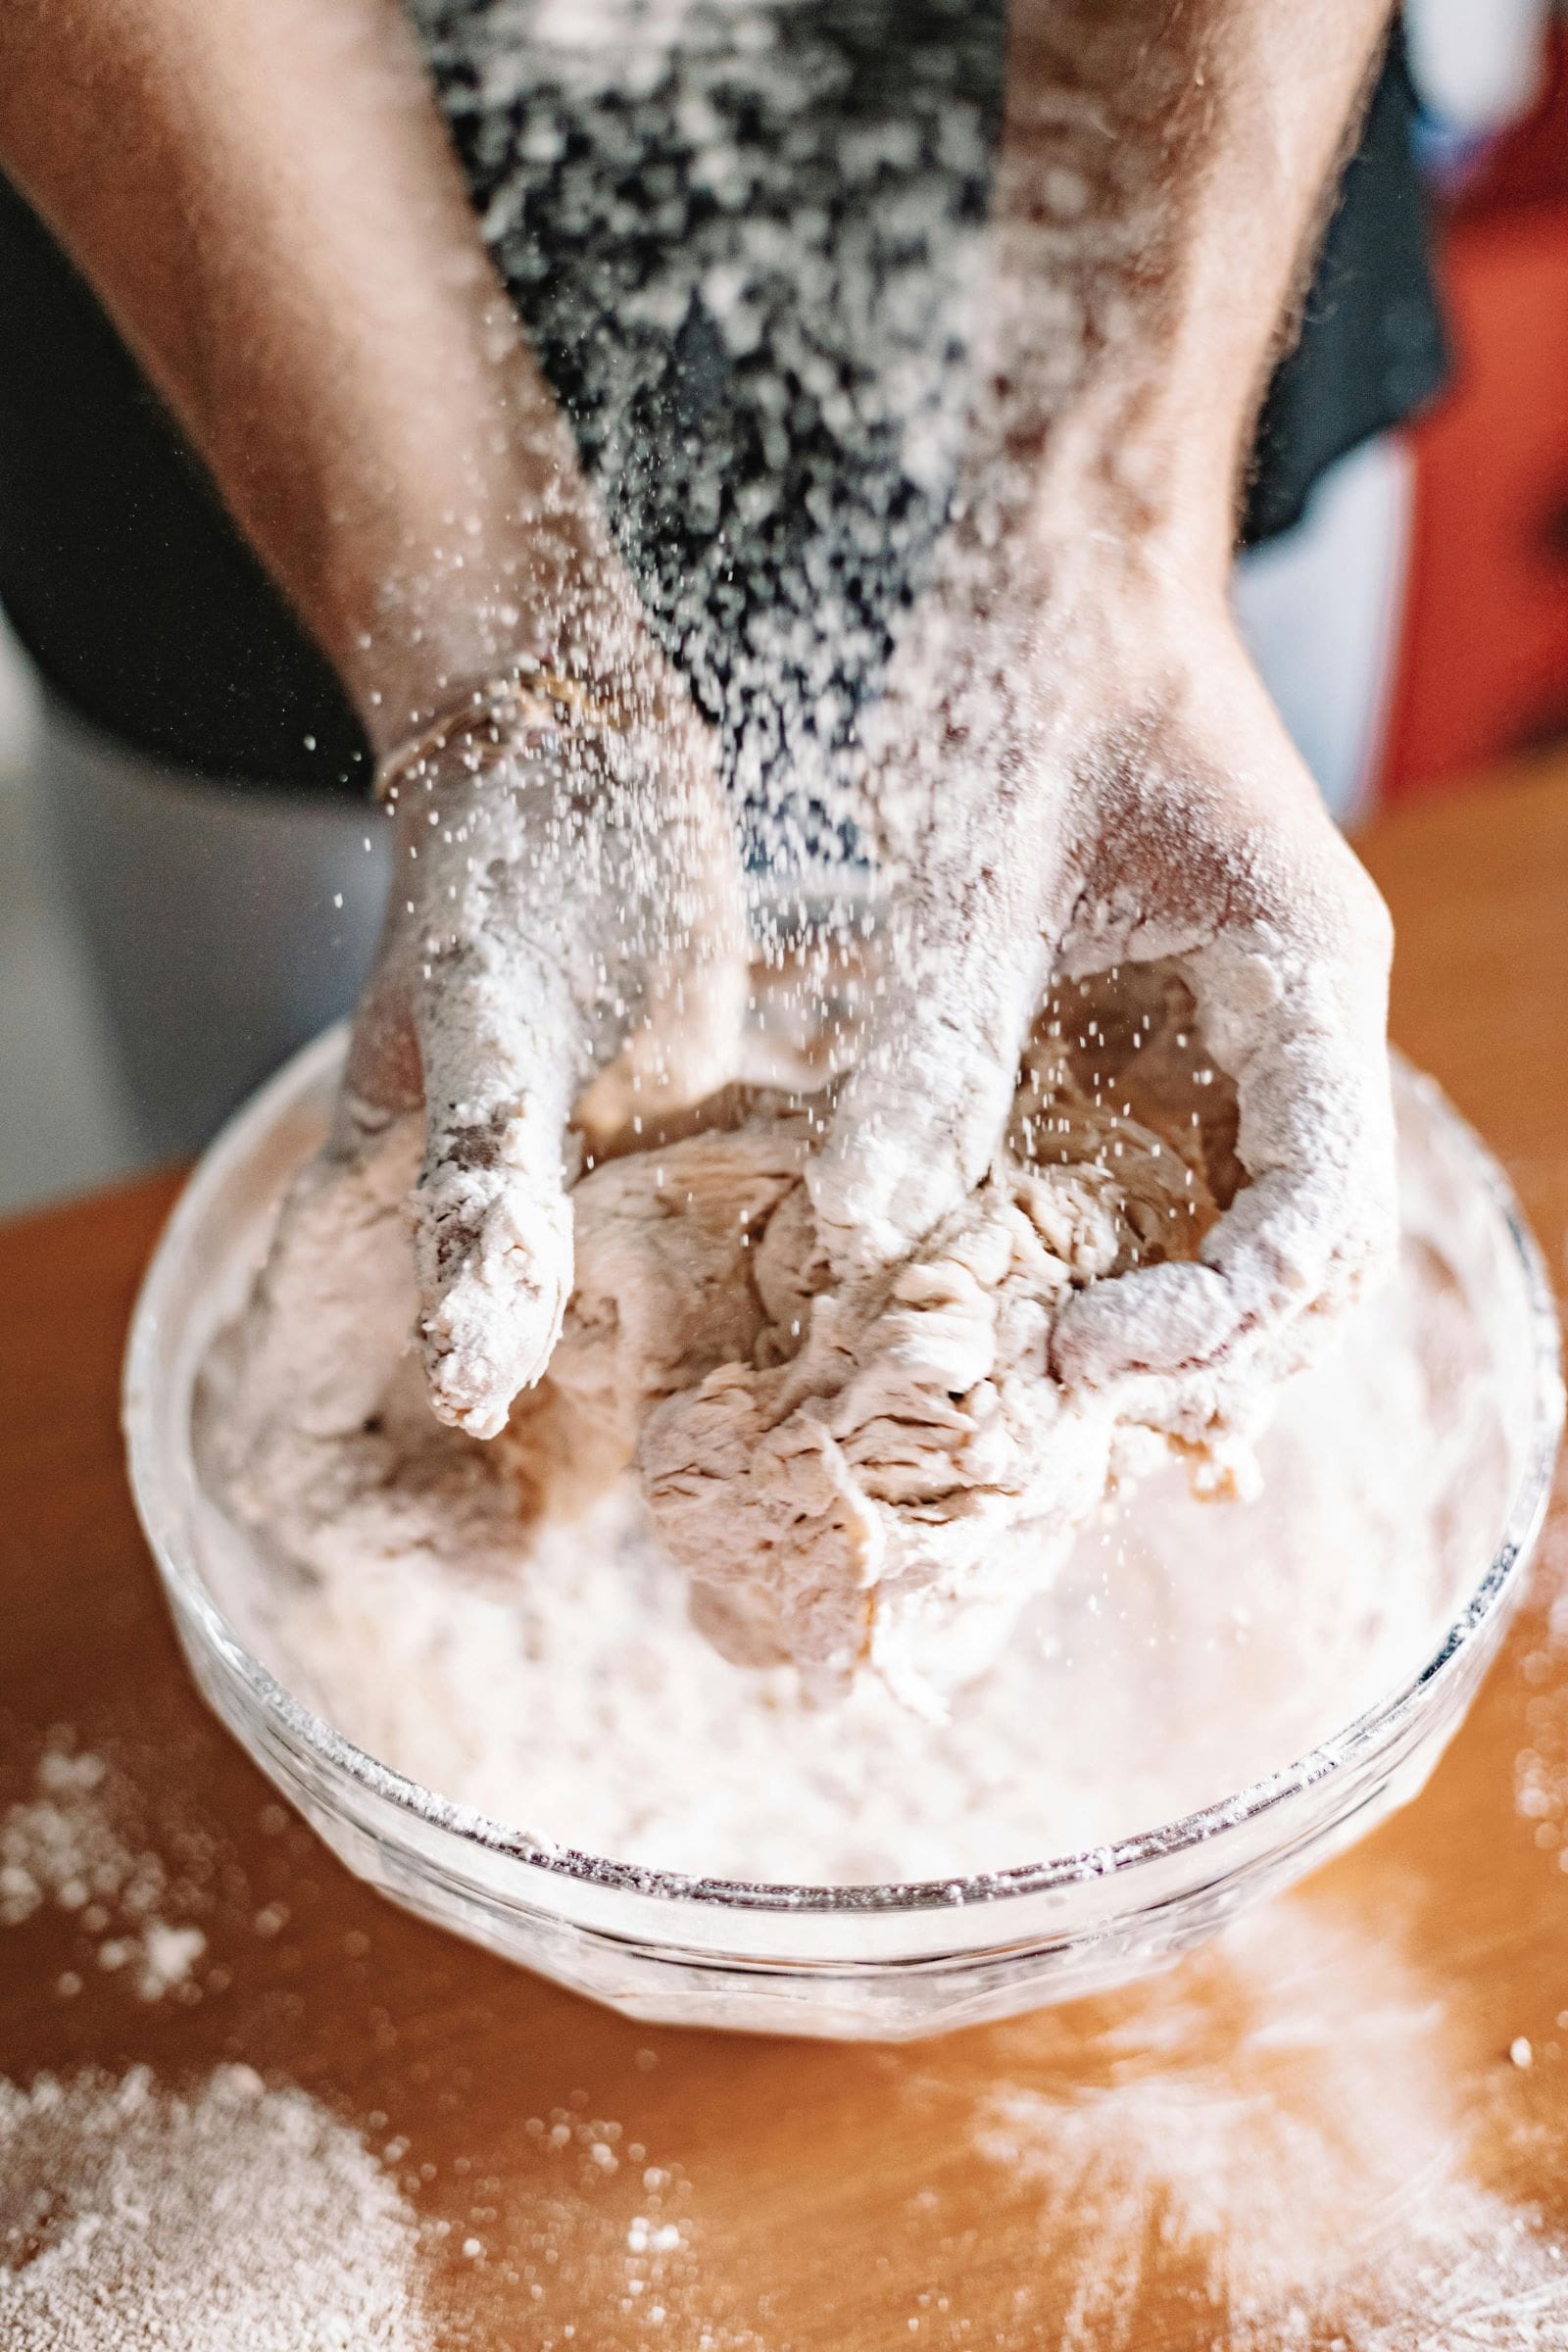
Slap and Fold Technique
For doughs that are extremely sticky or wet, the slap and fold technique can help build structure efficiently. This method strengthens gluten quickly while incorporating air.
- Process: Lift the dough, slap it onto the counter, then fold it over itself. Repeat until it becomes elastic and smooth.
- Best for: Bakers working with very high-hydration doughs that are difficult to knead traditionally.
- Tip: Work on a clean, unfloured surface to maximize dough stretch and strength.
Coil Fold Method
The coil fold method is a low-effort approach that gradually develops gluten through gentle handling. This technique helps maintain an open crumb structure.
- Process: Lift the dough from the center, allowing the sides to drape down, then tuck it under itself. Repeat every 30 minutes during bulk fermentation.
- Best for: Those who want strong gluten development without aggressive kneading.
- Tip: Perform the folds in a large container to minimize mess and maintain dough shape.
Choosing the Right Kneading Method
Knowing how to knead sourdough bread effectively depends on the hydration level of your dough and your preferred hands-on approach.
- For firm dough: Traditional kneading or stand mixer works well.
- For sticky dough: Stretch and fold or slap and fold methods are best.
- For minimal effort: Coil folds or stand mixer kneading allows gluten to develop passively.
By experimenting with these techniques, you can find the perfect method that suits your baking style while ensuring a well-structured and airy sourdough loaf.
Tips and Techniques for Perfectly Kneaded Sourdough Bread
Kneading sourdough bread might seem intimidating at first, but with the right techniques, you can master it. Below are some tips to guide you through the process.
Understand Dough Hydration
Dough hydration plays a crucial role in kneading. Higher hydration doughs are stickier but result in a lighter loaf with larger holes in the crumb. If you’re wondering how to knead sourdough bread with a high-hydration dough, the stretch and fold method is a better option than traditional kneading. For lower hydration doughs, traditional kneading works well.
Use the Right Kneading Technique
For wetter doughs, try using the stretch and fold method. If your dough is stiffer, use the traditional kneading technique—pressing down, folding, and rotating the dough. The goal is to develop the gluten for a lighter crumb and better rise.
Don’t Skip Autolyse
Autolyse is a resting period after mixing the dough, where the flour absorbs the water. This makes kneading easier and improves the dough’s texture. It reduces the effort needed to knead and helps you develop better gluten.
Maintain Consistent Temperature
The temperature of your dough affects how well it rises. Aim for a room temperature between 70°F and 75°F (21°C to 24°C) to promote healthy fermentation. If it’s too hot or cold, the dough may rise too quickly or slowly.
Pay Attention to Dough Texture
As you knead, the dough’s texture will change. It will start sticky but become smoother and more elastic as you continue. You know the dough is ready when it’s elastic and passes the windowpane test—stretching without tearing.
Use the Right Amount of Flour
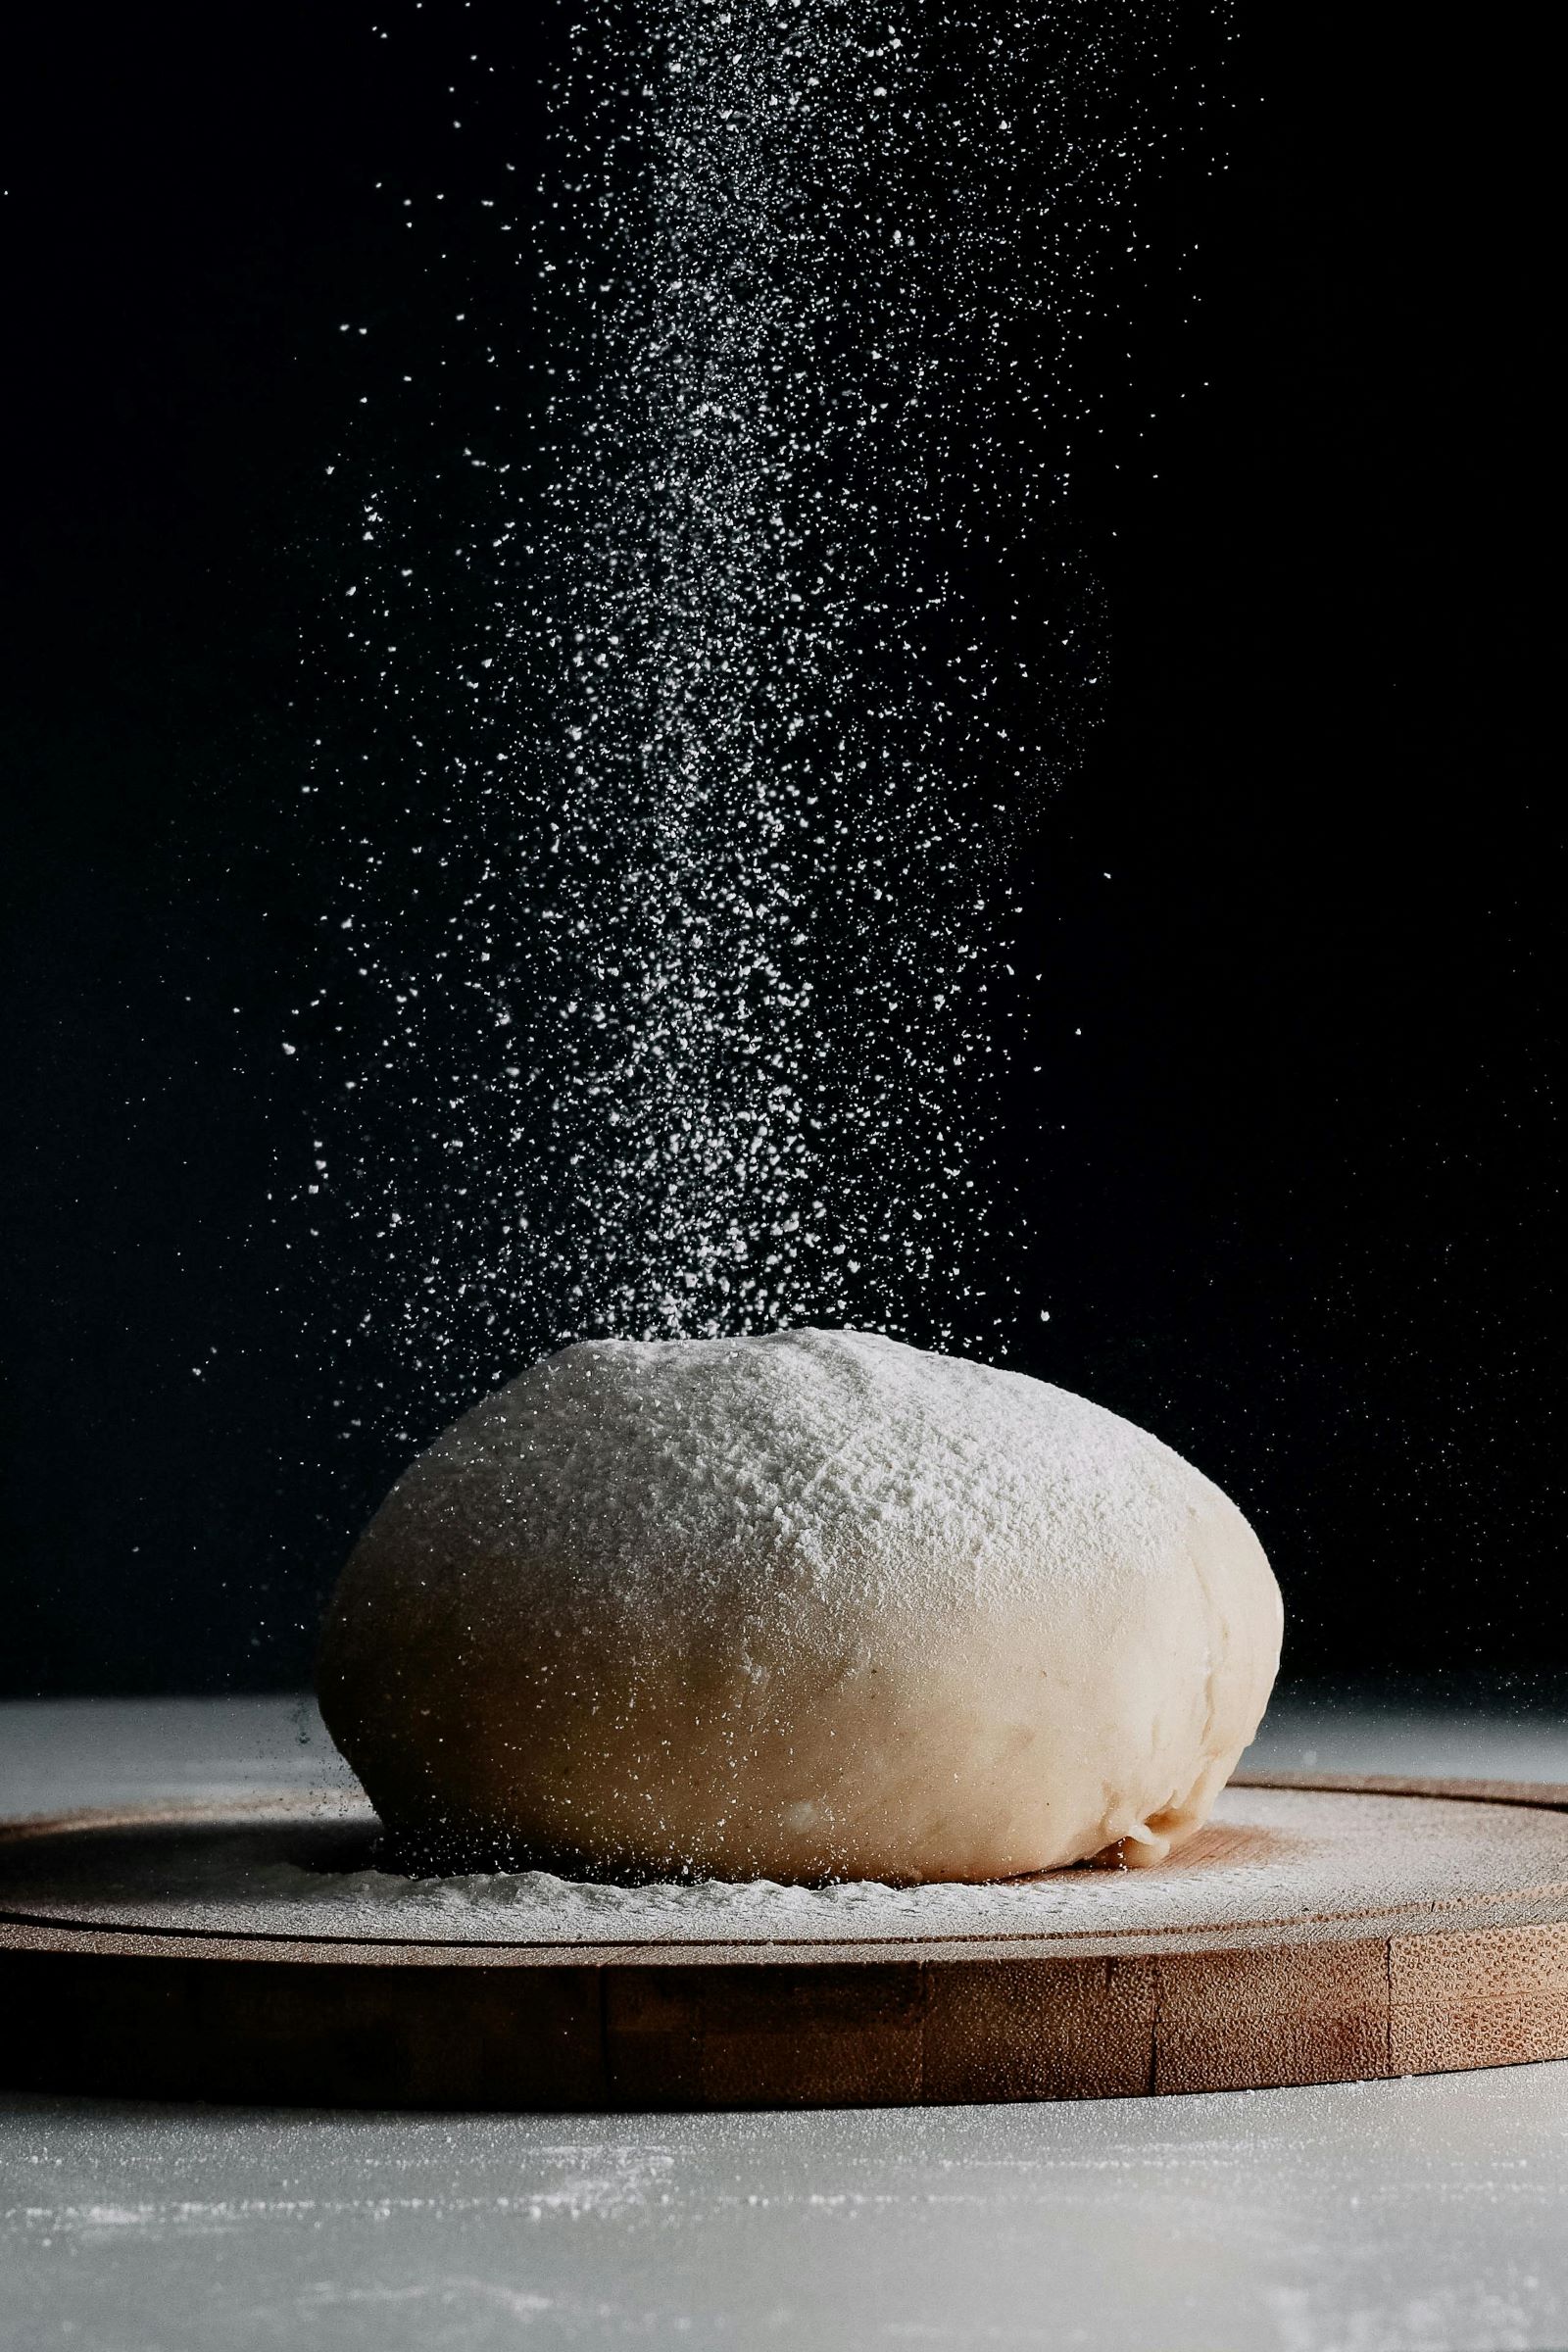
When kneading, try not to over-flour the surface. Excess flour can alter the dough’s hydration and affect the final result. A light dusting of flour should be enough to keep the dough from sticking.
Avoid Over-Kneading
While you want to develop gluten, over-kneading can result in tough dough. Stop when the dough feels smooth and passes the windowpane test. Trust your instincts and the dough itself.
Allow Proper Resting
Don’t rush the resting periods. After kneading, allow the dough to rest during fermentation and proofing. These resting stages help develop flavor and texture. The dough should double in size and feel light and airy when it’s ready to bake.
The Science Behind Kneading
Kneading sourdough bread is an essential step in creating a loaf with the right texture, rise, and crumb. But there’s more going on beneath the surface.
Kneading is not just a physical act; it’s a scientific process that helps develop the dough’s structure and elasticity. Understanding the science behind kneading can help you bake the perfect sourdough every time.
What Happens During Kneading?
Kneading is a process of working the dough by hand or with a machine to develop the gluten network. Gluten, a protein found in wheat flour, is responsible for giving sourdough bread its chewy texture. But gluten doesn’t form by itself—it needs both time and the right conditions. Kneading encourages the gluten proteins to stretch and bind together, creating long strands that trap air and help the dough rise.
- Structure: The stronger the gluten, the better the dough can hold its shape and rise during fermentation.
- Formation of Gluten: As you knead, you activate the gluten proteins, gliadin and glutenin, which bond to form gluten.
- Elasticity: Kneading gives the dough elasticity, which allows it to stretch and trap the gas produced by fermentation.
Hydration’s Effect on Kneading
The water-to-flour ratio in your dough plays a major role in how it kneads and how it behaves during fermentation. High-hydration doughs tend to be stickier and more challenging to knead, but they create a lighter, airier loaf with a more open crumb. When there’s more water in the dough, the flour absorbs it better, and gluten development happens more evenly.
On the other hand, drier doughs are firmer and require more effort to develop the gluten. Though these doughs are easier to handle, they often lead to denser bread. The key is finding the right balance for your desired bread texture. High-hydration doughs are often kneaded with more care, while drier doughs benefit from a more vigorous approach.
Gas Production and Kneading
During the fermentation process, wild yeast and bacteria in the sourdough starter produce carbon dioxide. This gas is what makes the dough rise. However, without a well-developed gluten structure, the gas can escape, causing the dough to deflate.
Fermentation Continuation: After kneading, the dough needs to rest, allowing fermentation to continue and further develop the bread’s flavor and texture.
Gas Trapping: Kneading creates a strong gluten network that traps the carbon dioxide, allowing the dough to rise properly.
Stretch and Fold: A Different Approach
Not all kneading requires intense effort. For high-hydration doughs, a gentler technique called “stretch and fold” can be a better option. This method involves stretching the dough and folding it over itself, which helps develop the gluten without overworking it.
- Hydration-Friendly: High-hydration doughs benefit greatly from stretch and fold, as it allows the gluten to form without making the dough too dense.
- Less Aggressive: Stretch and fold is ideal for doughs that are too sticky for traditional kneading.
- Maintains Airiness: This method allows you to preserve the air pockets within the dough, contributing to an open crumb once baked.
Timing and Kneading Techniques
One of the most important factors in kneading sourdough bread is timing. Over-kneading the dough can lead to tough, dense bread. On the flip side, under-kneading the dough means the gluten network won’t fully develop, which can prevent the dough from rising properly.
To achieve the perfect knead, aim for around 8-10 minutes of kneading. You’ll know the dough is ready when it becomes smooth, elastic, and slightly tacky to the touch. If it sticks to your hands, add a little flour. When poked, the dough should bounce back, indicating that the gluten is well-developed and ready for fermentation.
Kneading for the Perfect Texture
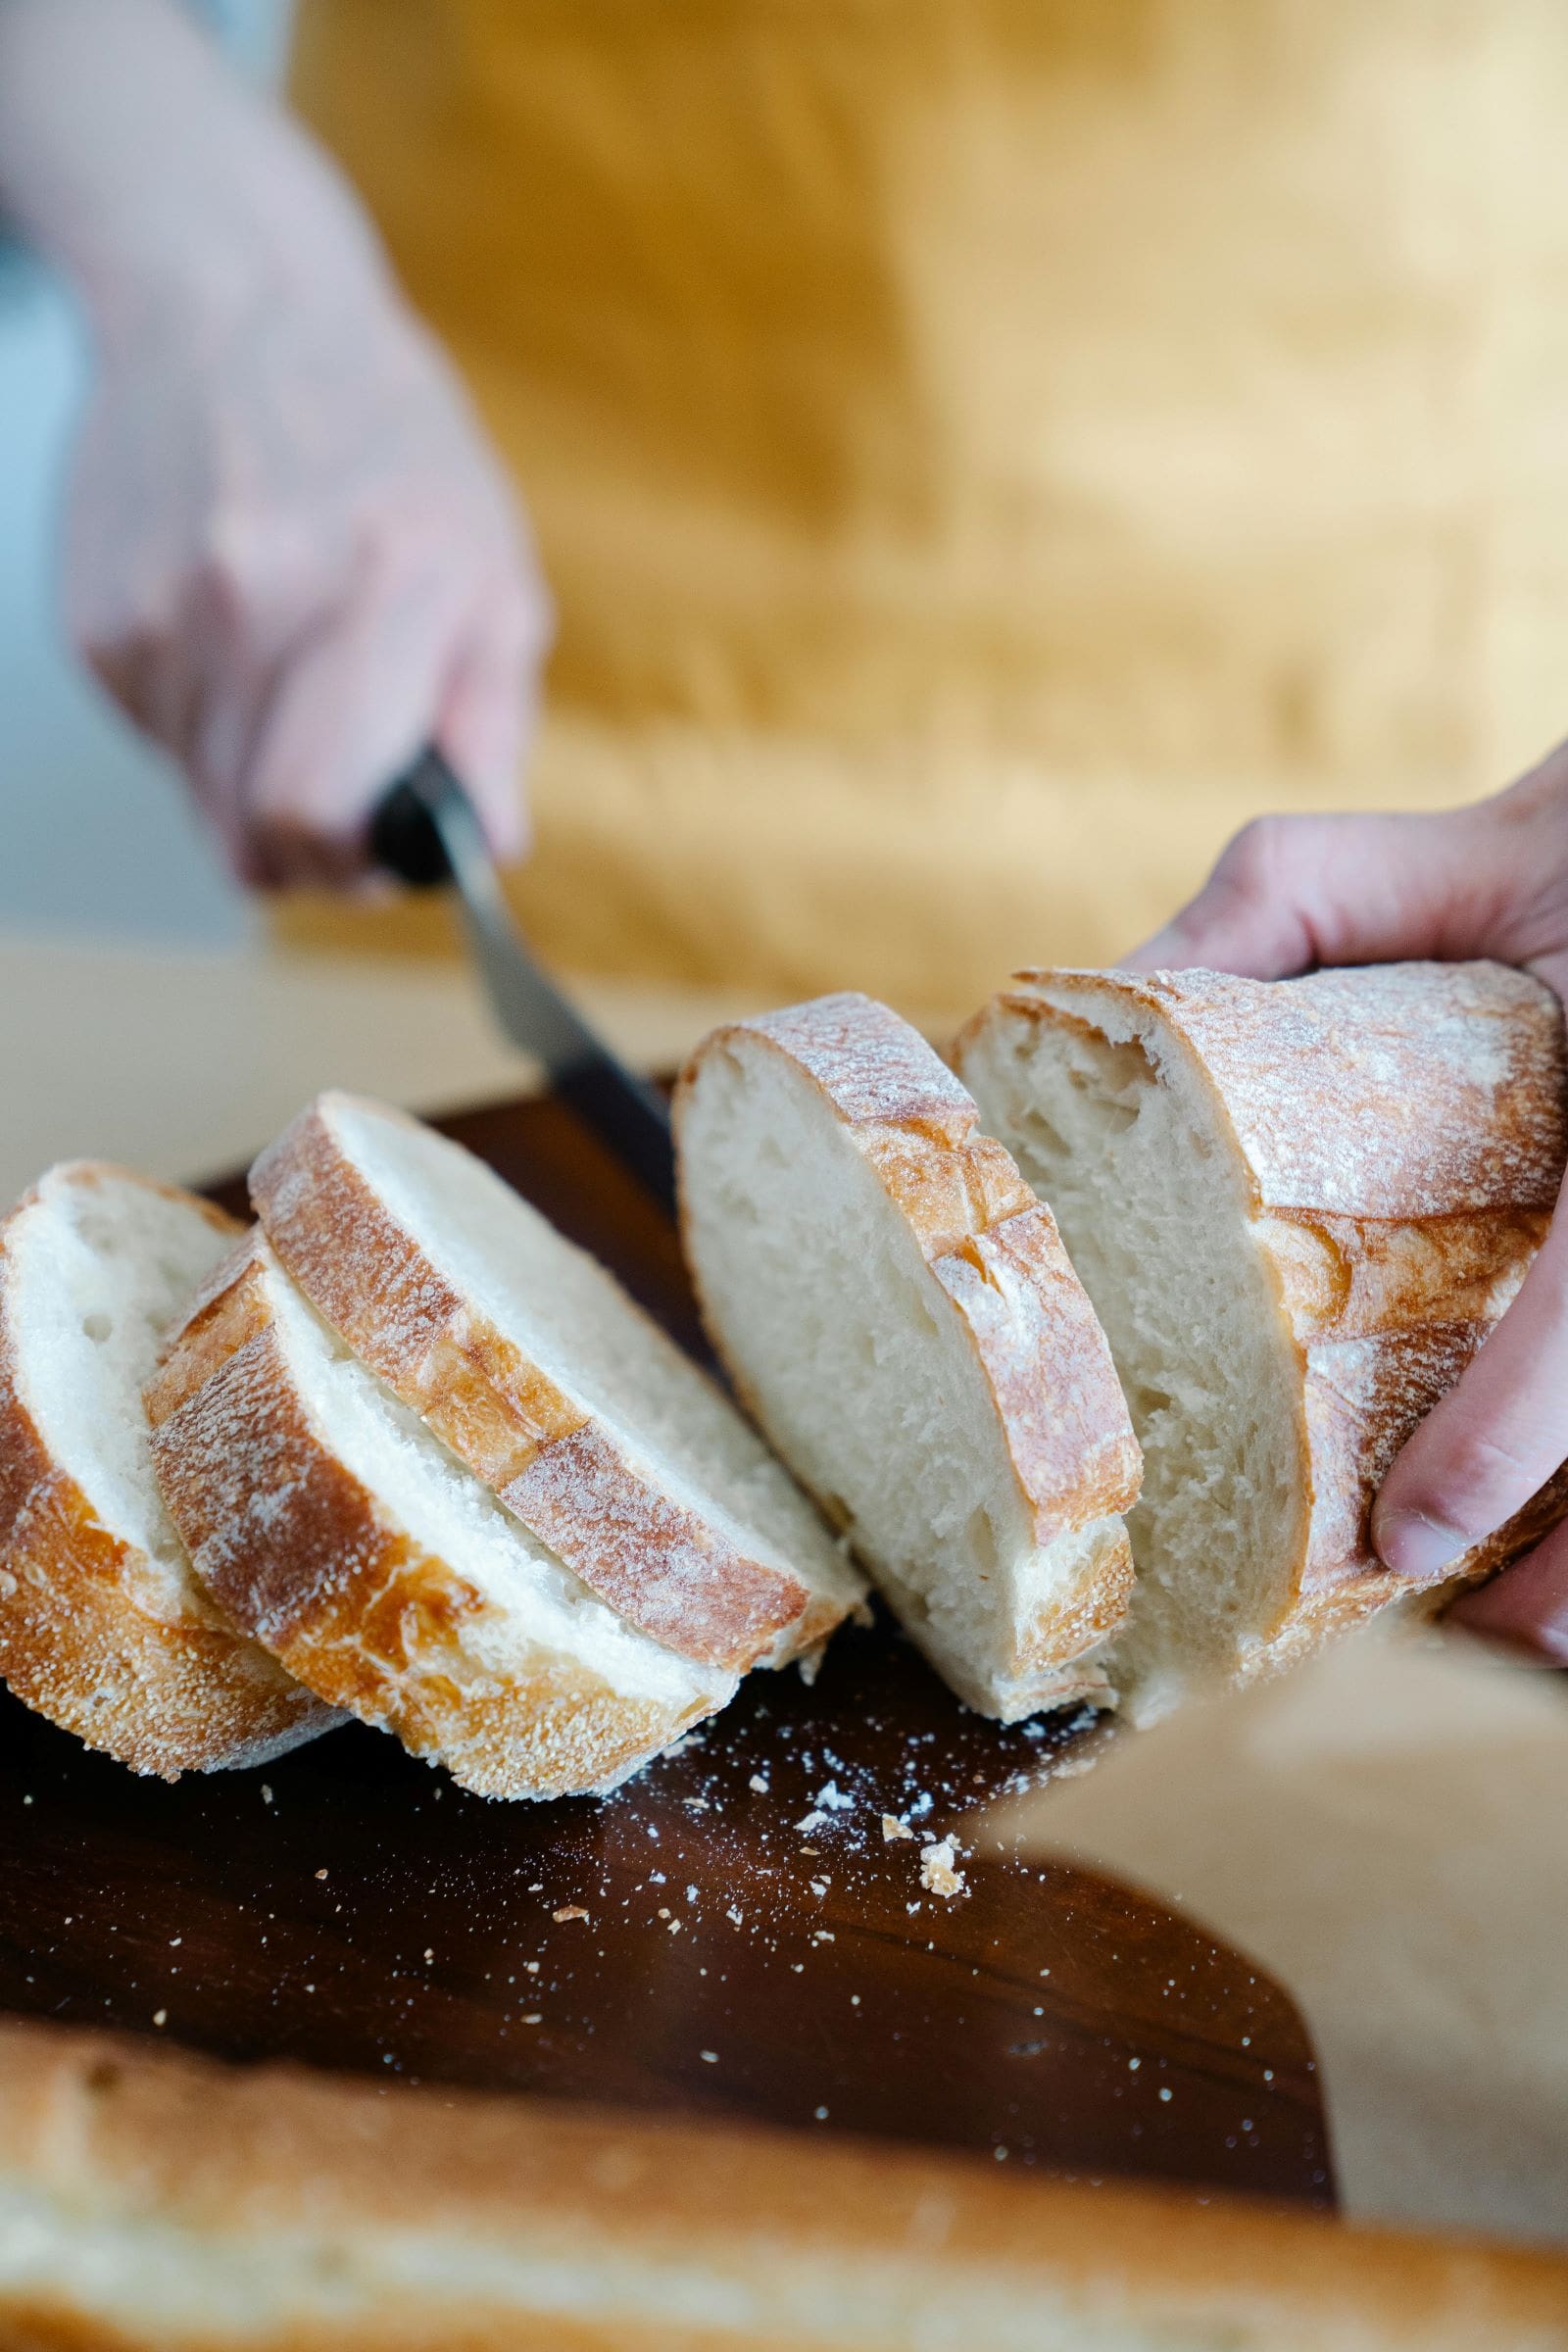
The texture and crumb of your sourdough bread are heavily influenced by how well the dough is kneaded. Kneading helps create an open crumb structure, which gives sourdough its characteristic chewiness and airy texture. The gas trapped inside the dough during kneading and fermentation expands during baking, forming air pockets in the bread.
In summary, kneading sourdough bread is a delicate balance of timing, technique, and hydration. The process helps develop the gluten network that holds the dough together, traps fermentation gases, and creates the chewy texture that defines great sourdough.
Whether you knead traditionally or use the stretch and fold method, the goal is the same: to create a dough that can rise beautifully and bake into a light, airy loaf.
Common Problems When Kneading Sourdough Bread
Kneading sourdough bread might seem straightforward, but several common mistakes can affect the outcome of your loaf. Understanding these mistakes and knowing how to avoid them will ensure a better texture and flavor in your bread. Here are a few pitfalls to watch out for.
Over-Kneading the Dough
One of the most common mistakes when learning how to knead sourdough bread is over-kneading. While kneading is essential to develop the dough’s gluten, too much kneading can result in tough, dense bread. If you knead the dough for too long, you may end up breaking down the gluten structure too much, making it harder for the dough to rise and creating a heavy loaf.
How to avoid it: Pay attention to the dough’s feel. Once it becomes smooth, elastic, and passes the windowpane test, it’s ready. Trust your senses and stop kneading when it reaches the right texture.
Adding Too Much Flour
A common mistake is adding too much flour when kneading sourdough. It’s tempting to sprinkle extra flour when the dough sticks to your hands or the work surface, but over-flouring can affect the dough’s hydration balance. This can lead to a denser loaf and a crumbly texture.
How to avoid it: Use just enough flour to keep the dough from sticking excessively. If the dough is too sticky, consider using a damp cloth to keep the dough from drying out instead of adding more flour.
Kneading at the Wrong Temperature
Temperature plays a significant role in sourdough bread. Kneading dough in a cold environment can slow down fermentation, while a warm environment may cause it to ferment too quickly. Both extremes can result in underdeveloped flavor or poor rise.
How to avoid it: Try to knead the dough at room temperature (around 70°F to 75°F). If it’s too cold, let the dough rest in a warmer spot to maintain a steady temperature. If your kitchen is warm, you may need to monitor the dough more closely to avoid over-fermentation.
Skipping the Autolyse Stage
Autolyse is a crucial step that many bakers overlook, especially when learning how to knead sourdough bread. It’s the resting period after mixing the dough, where the flour absorbs the water. Skipping this stage can result in a dough that’s harder to knead and less elastic.
How to avoid it: Always allow the dough to rest for 20 to 30 minutes after mixing flour, water, and starter. This will make kneading easier and improve the dough’s texture, making it more manageable.
Rushing the Fermentation Process
Another mistake is rushing the fermentation process. Kneading sourdough bread is only part of the equation; fermentation and proofing are equally important. If you skip or shorten the fermentation times, you may end up with dense, under-risen bread.
How to avoid it: Be patient during fermentation. Allow the dough to rise fully, whether that means letting it rise at room temperature or refrigerating it overnight for a slower fermentation. This will help develop the flavor and structure of your bread.
Not Paying Attention to the Dough’s Texture
Ignoring the dough’s texture while kneading can lead to mistakes. Not paying attention to how it feels can result in under-kneaded dough, which will affect the rise, or over-kneaded dough, which can result in a dense crumb.
How to avoid it: Continuously check the dough as you knead. It should feel smooth, soft, and slightly tacky. If it becomes too sticky, let it rest, or use minimal flour to make it manageable. When it passes the windowpane test, it’s done.
Not Letting the Dough Rest Enough
Resting the dough between kneading stages is vital for gluten development and relaxation. Skipping these rests, or not allowing enough time for the dough to rise, can lead to a tight, rubbery loaf with poor crumb structure.
How to avoid it: After each kneading or folding session, give the dough enough time to rest. The first rise should allow the dough to double in size, and during proofing, it should feel airy and springy. Don’t rush these stages—proper resting time is essential for a successful loaf.
How Temperature Affects Kneading Sourdough Bread

Temperature plays a significant role in the kneading process, especially when learning how to knead sourdough bread. It influences the dough’s behavior, affecting everything from gluten development to fermentation. The temperature of your environment, your dough, and your hands can all impact the outcome of your bread.
The Impact of Room Temperature
Room temperature can either help or hinder your kneading process. When the room is too cold, the dough becomes stiffer, and the yeast may struggle to activate. In contrast, a warm environment speeds up fermentation, making the dough more pliable and easier to work with.
What to do: Aim for a comfortable room temperature between 70°F to 75°F (21°C to 24°C). If it’s too cold, you can warm the area by placing your dough in a slightly heated oven or near a warm stove.
How Temperature Affects Dough Consistency
The temperature of the dough directly affects its consistency during kneading. When the dough is cold, it may feel firm and hard to stretch. As the dough warms up, it softens, and gluten strands begin to form more easily. Kneading in warmer temperatures is often quicker because the dough becomes more manageable.
Tip: If your dough is too stiff, try letting it rest for a few minutes. This helps the dough relax and become easier to knead.
Cold Dough and Longer Kneading Time
Cold dough requires longer kneading times because the gluten needs more time to develop. When you knead sourdough dough that is colder, you may notice it feels stiffer. More effort may be required to get the same elasticity and smooth texture as dough at a warmer temperature.
Tip: When using colder dough, be patient and continue kneading. The dough will eventually warm up and become more elastic.
Warm Dough and Faster Kneading
Warmer dough is more relaxed and easier to knead, but there is a risk of over-fermentation. If you knead dough that is too warm, you may find it loses its structure more quickly. This could result in a denser loaf as the dough can collapse under its own weight.
What to do: If your dough becomes too warm, allow it to cool before continuing the kneading process. This will help maintain its strength and structure.
Temperature and Fermentation
Temperature also affects how quickly your sourdough ferments. Warmer environments speed up fermentation, while colder ones slow it down. Since fermentation is crucial for flavor and rise, adjusting the temperature in your kitchen can help you control the fermentation speed, which in turn affects how to knead sourdough bread.
Tip: If your dough ferments too quickly, move it to a cooler area. If it’s fermenting too slowly, place it in a slightly warmer environment to encourage a faster rise.
Final Thoughts: Perfecting Your Kneading Technique

Kneading sourdough bread is an essential skill that takes practice and patience. Whether you’re a beginner or a seasoned baker, perfecting this technique will drastically improve your results. It’s not just about pushing and folding the dough—understanding the dough’s behavior and responding to it is key.
Focus on Texture, Not Just Time
When learning how to knead sourdough bread, it’s important to focus on the texture of the dough, not just the time spent kneading. Kneading time can vary depending on the dough’s hydration and your technique, so instead of relying on a set amount of time, feel the dough. It should become smoother and more elastic as you work it. Don’t rush the process; give it time to develop naturally.
Be Patient and Let the Dough Rest
Patience is crucial when working with sourdough. Allow your dough to rest at each stage to help it develop flavor and texture. From the initial autolyse to the final proofing, each resting period plays a vital role in achieving the perfect loaf. If you’re wondering how to knead sourdough bread effectively, remember that resting helps the dough relax and strengthens its structure, making the kneading process easier.
Keep Practicing and Fine-Tuning
Kneading sourdough bread is a skill that improves with practice. Don’t get discouraged if your first few loaves aren’t perfect. Each batch teaches you something new about the dough, helping you adjust your technique over time. Keep experimenting with different hydration levels, kneading methods, and resting periods. Eventually, you’ll develop a feel for the dough that allows you to achieve the perfect crumb and texture every time.
Understand Your Dough’s Needs
Every dough is different, and understanding its needs is key to perfecting how to knead sourdough bread. Whether it’s a high-hydration dough that requires gentle stretching or a stiffer dough that benefits from traditional kneading, knowing how your dough reacts to different techniques will help you refine your approach.
FAQs About How to Knead Sourdough Bread
What is the best way to knead sourdough bread?
To knead sourdough bread, start by folding the dough in half, pressing it down, and stretching it. Rotate and repeat. The goal is to develop gluten. Use the stretch and fold method for wetter doughs, or knead traditionally for firmer doughs.
How long should I knead sourdough bread?
Knead sourdough bread for about 10 minutes with traditional methods. However, the time depends on the dough’s hydration level. Wet doughs require less time, while stiffer doughs may need more effort. Always check the dough’s texture to ensure proper kneading.
What happens if you over-knead sourdough bread?
Over-kneading sourdough bread can lead to dense, tough loaves. Too much kneading breaks down the dough’s structure, preventing a good rise. It’s important to stop when the dough becomes smooth, elastic, and passes the windowpane test.
Can I knead sourdough bread by hand?
Yes, you can knead sourdough bread by hand. Kneading by hand gives you better control over the dough’s texture. Use the stretch and fold technique or traditional kneading methods. Just ensure you don’t overwork the dough.
How do I know when the sourdough dough is ready?
The dough is ready when it’s smooth, elastic, and no longer sticky. Perform the windowpane test: stretch a small piece of dough thinly. If it stretches without tearing, your dough is ready for the next stage.
Do I need to use a stand mixer to knead sourdough bread?
While a stand mixer can make kneading easier, it’s not necessary. You can knead sourdough bread by hand or with a dough scraper. A stand mixer helps save time but may not give you the same feel for the dough.
What should I do if the dough is too sticky to knead?
If the dough is too sticky to knead, avoid adding too much flour. Instead, wet your hands or use a dough scraper. This will help you handle the dough without changing its texture. Sticky dough is normal for sourdough.
Can I knead sourdough bread too much?
Yes, kneading sourdough bread too much can lead to tough, dense bread. Kneading should be done just enough to develop gluten. It’s essential to pay attention to the dough’s texture and stop once it becomes smooth and elastic.
How does autolyse help with kneading sourdough bread?
Autolyse helps with kneading sourdough bread by giving the flour time to absorb water, making the dough easier to work with. This resting period improves gluten development, reducing the effort needed during kneading and creating a better texture in the final loaf.
Should I rest my dough while kneading sourdough bread?
Yes, resting the dough is crucial during kneading. This allows the gluten to relax, making it easier to shape. Resting periods between kneading sessions also give the dough time to ferment, resulting in better flavor and texture.
Amazon and the Amazon logo are trademarks of Amazon.com, Inc, or its affiliates.